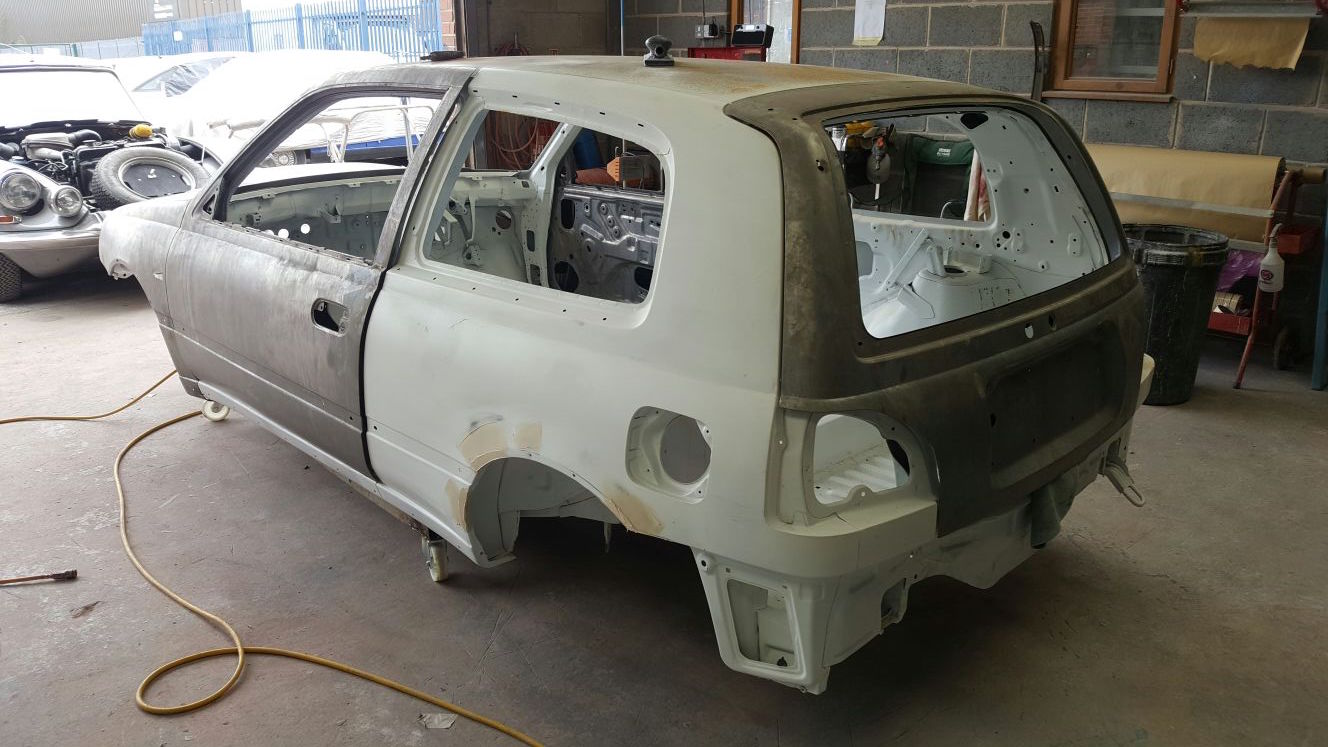
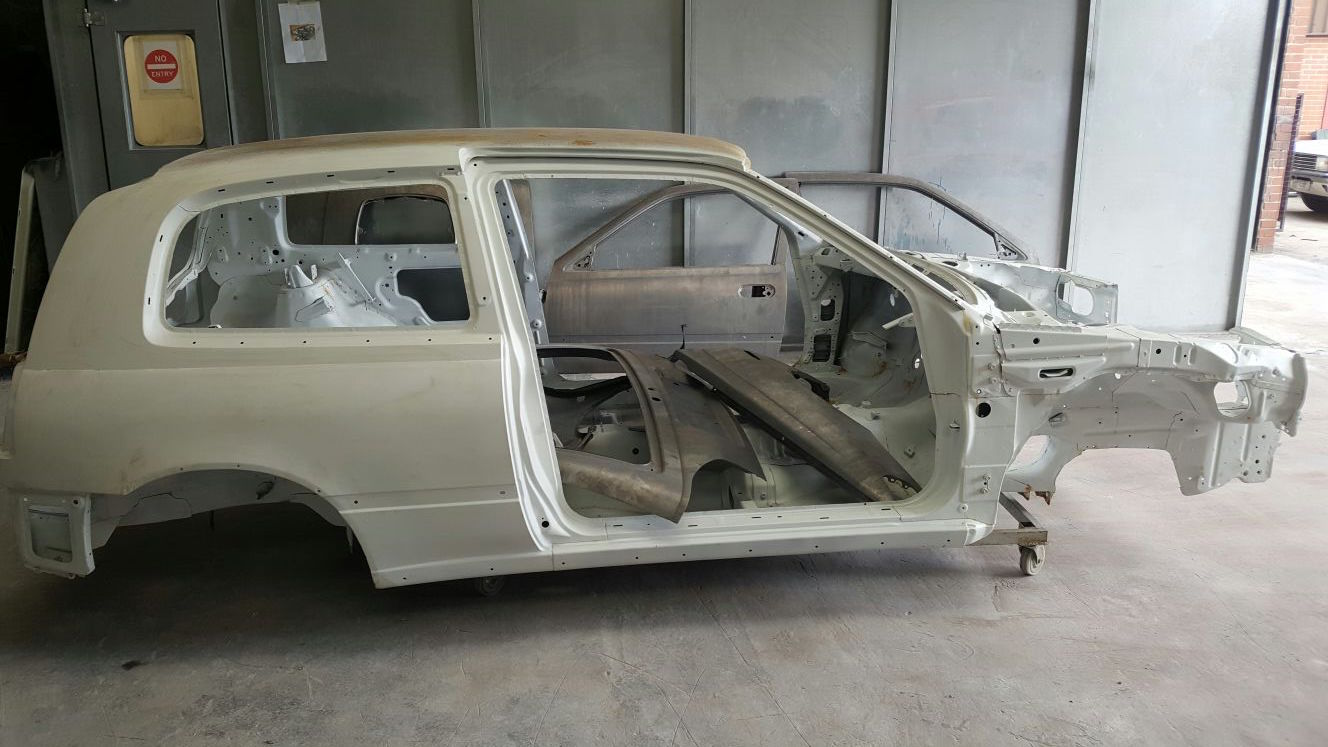
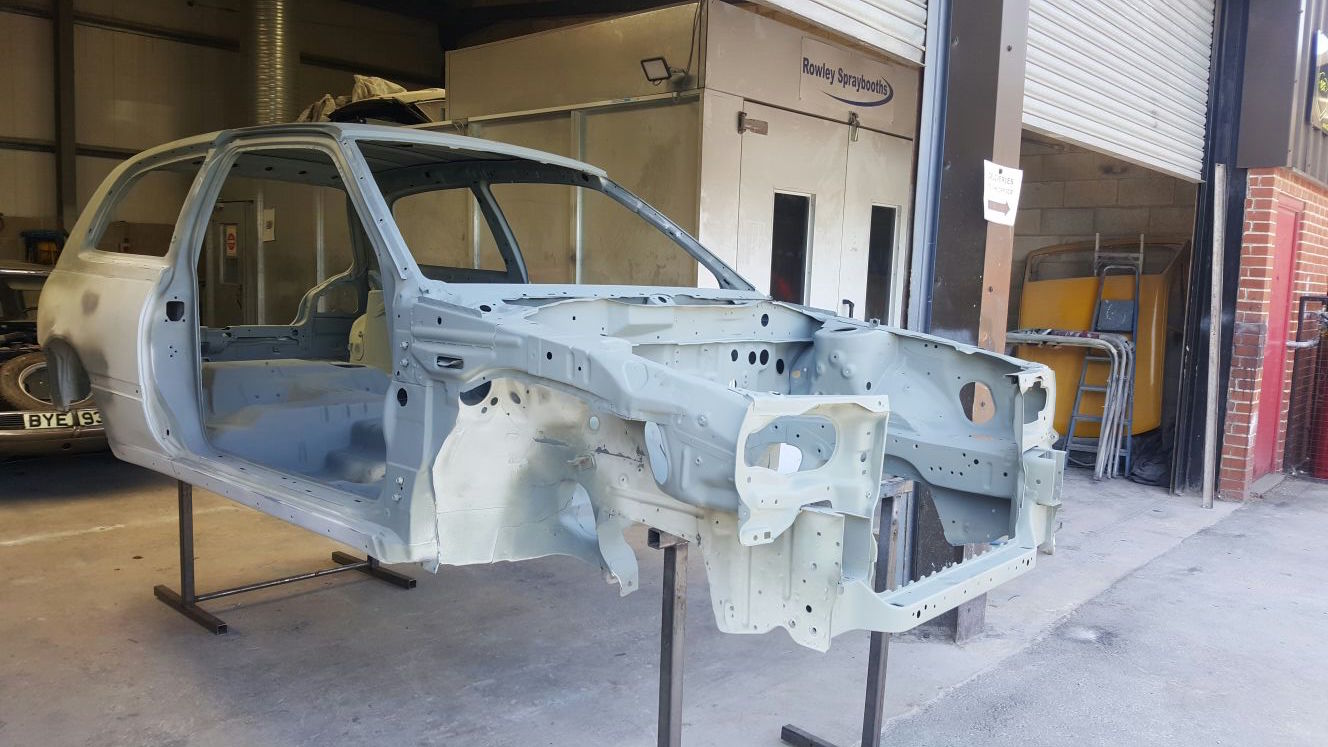
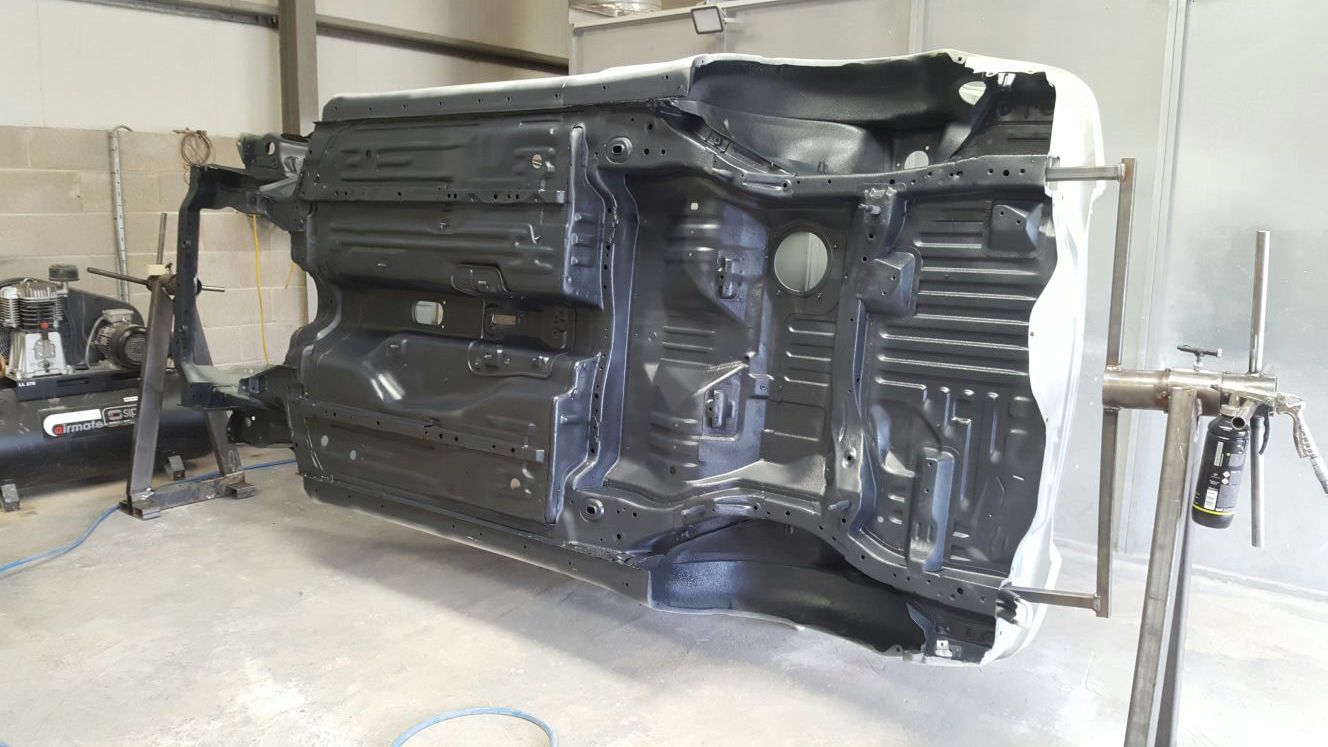
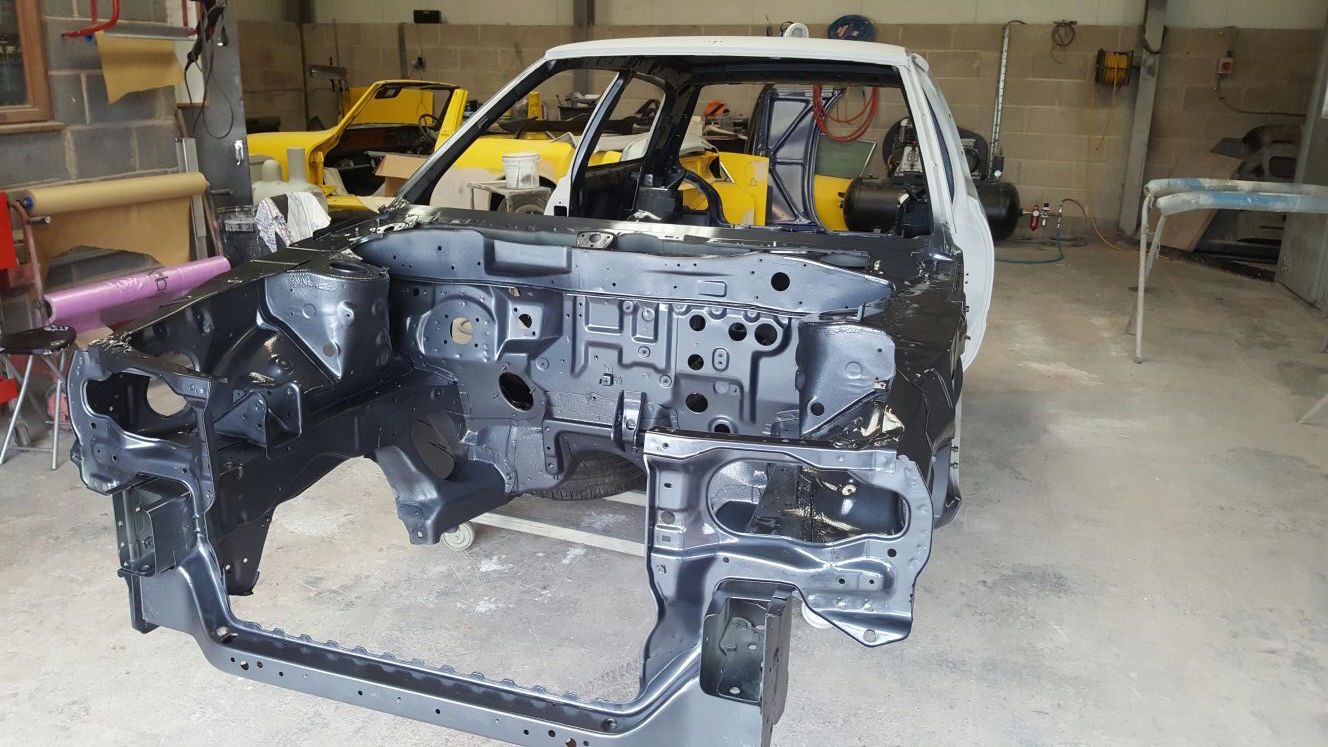
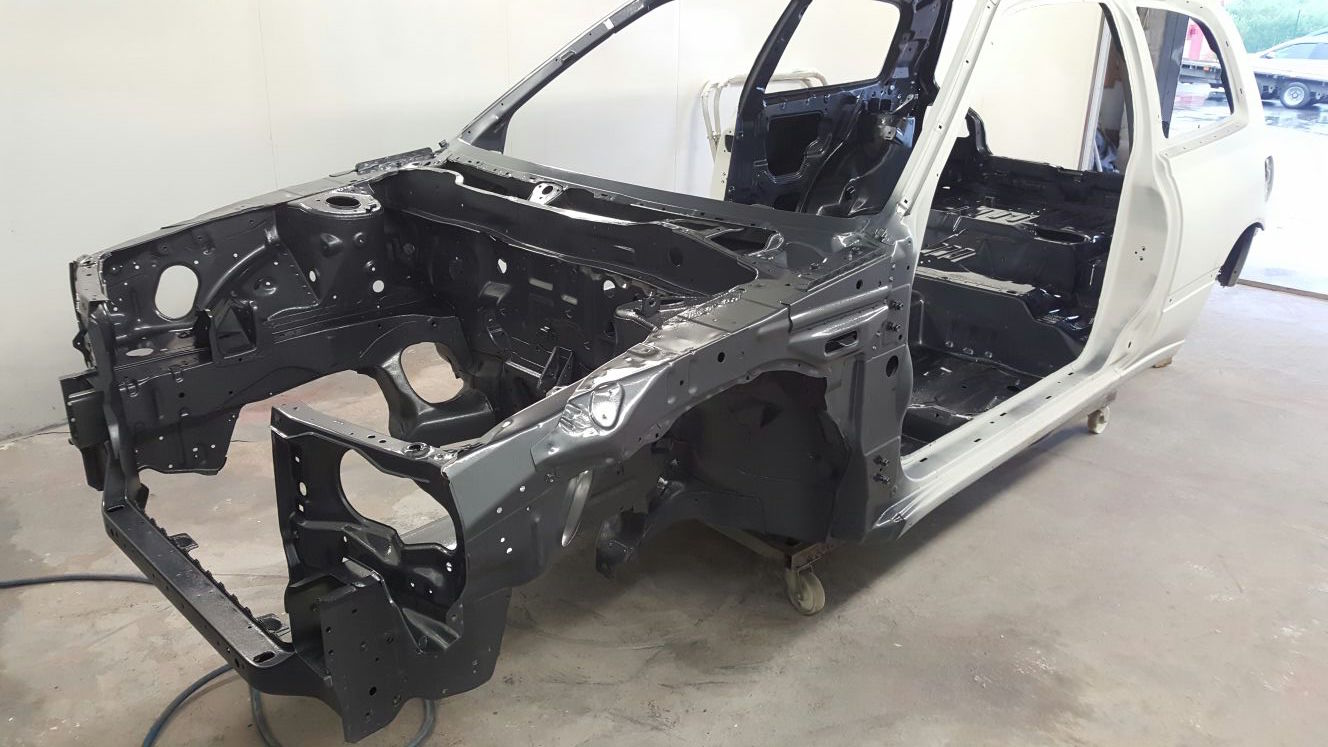
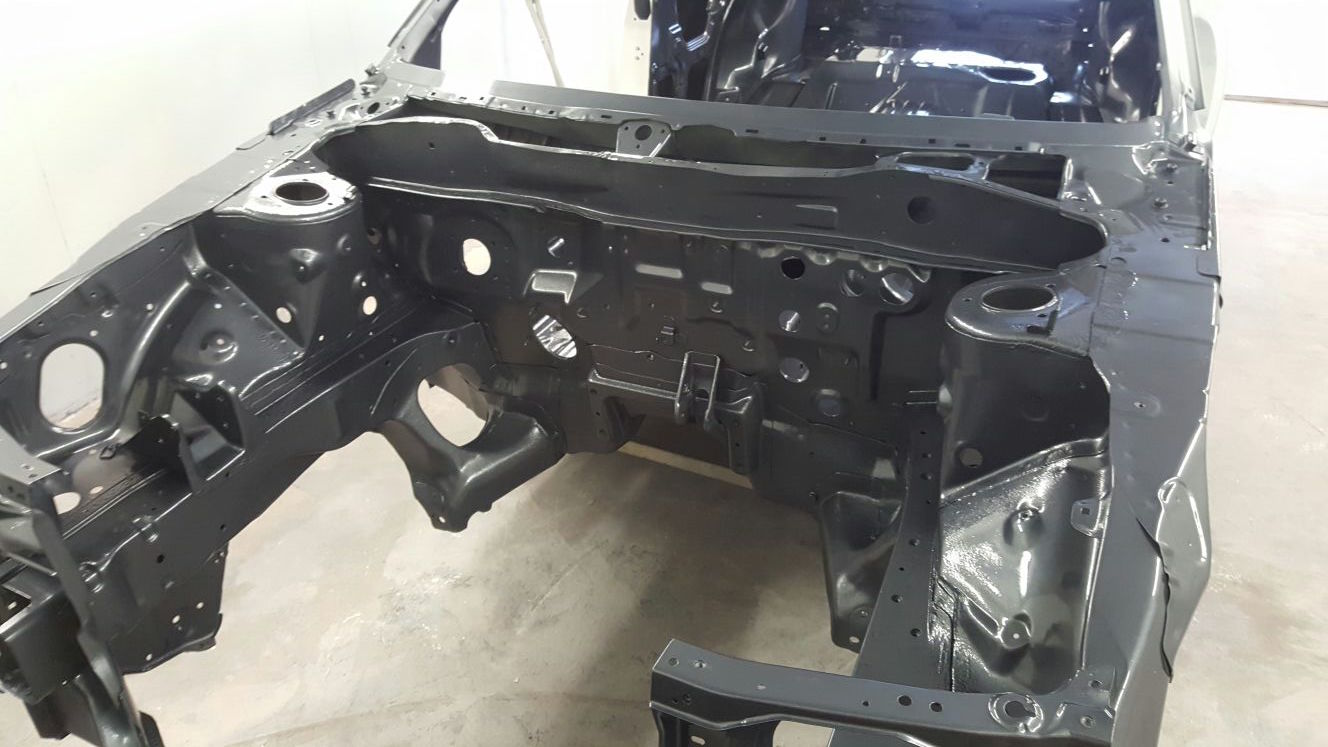
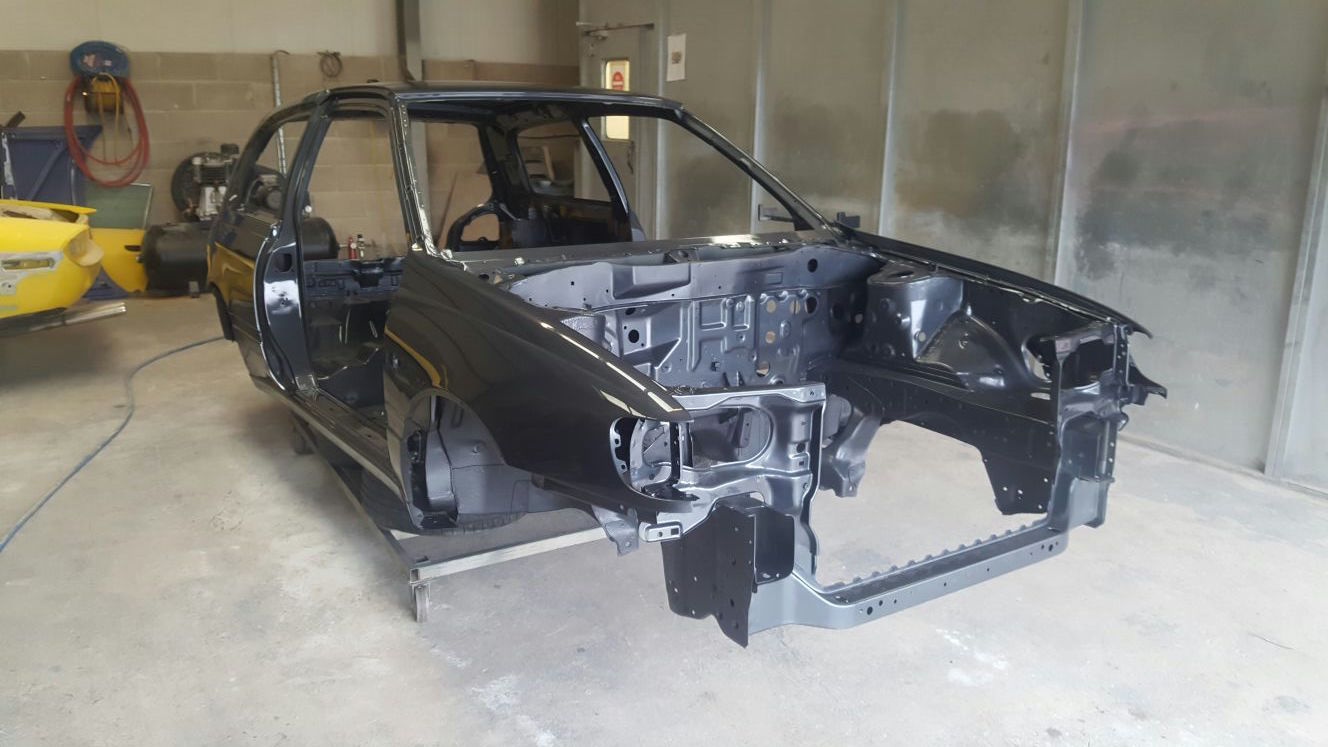
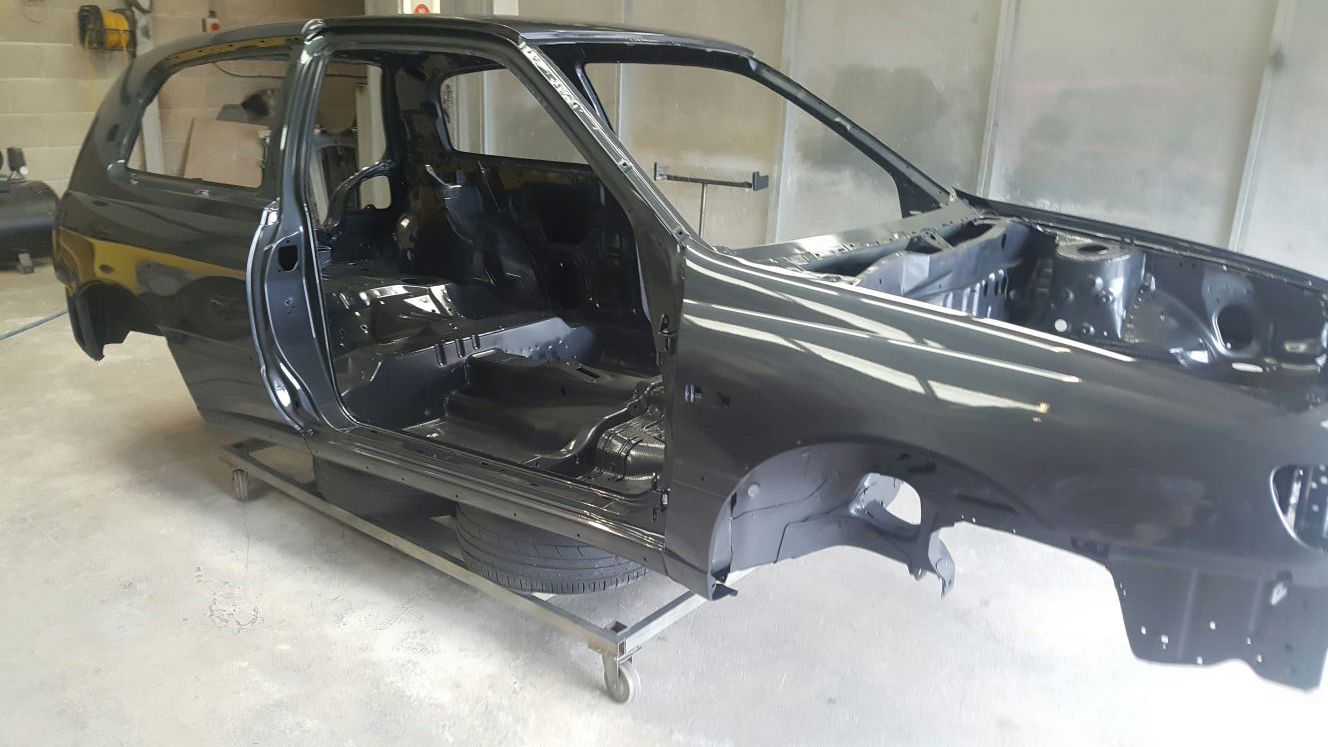
Gtir Motorsport club
Would you like to react to this message? Create an account in a few clicks or log in to continue.
Gtir Motorsport club

Welcome to the largest Nissan Pulsar & Sunny GTI-R Forum. Masses of info, friendly members, cars for sale, lots of spares. Best forum on the net by far. Everything your gtir needs is here.


You are not connected. Please login or register

Restoration Project

+9
Cosmic73
DC313
steven_c
mike74
hagger
Ryaneg6freak
typeritr
nomad
johnny gtir
13 posters

Go to page : Previous  1, 2, 3, 4, 5, 6  Next

Go down  Message [Page 3 of 6]

51Restoration Project - Page 3 Empty Re: Restoration Project 23rd February 2018, 4:34 pm

Ryaneg6freak

Ryaneg6freak

gtir_woody wrote:
Ryaneg6freak wrote:
gtir_woody wrote:
Ryaneg6freak wrote:Acid dipping is fantastic, I'd love to do it but it's very expensive in the USA thanks to the EPA trying to force these companies out of business (over $1500 to have my shell done) and the nearest place that does it is a 14 hour drive away, in Oregon

14 hour drive! Im complaining driving an hour and half to get my engine rebuilt lol

Yea, the USA is rather large lol.  I live in Las Vegas, Nevada and the closest metal dipper is in Eugene Oregon, 14 hours due northwest.  Pretty much sucks.

After watching dudes on YouTube, road tripping looks like so much fun over there though Laughing

Yea, it sometimes is but loses it's luster after awhile.... Laughing

52Restoration Project - Page 3 Empty Re: Restoration Project 23rd February 2018, 8:40 pm

Pulsartim

Pulsartim

Hi mike74 the only bushes that needed the sleeves leaving in were the rear subframe bushes, I was going to fit powerflex ones but on getting the rubber part of the bush out I found the sleeves were rusted through so I ended up pushing them out.    I'm not sure what I'm going to fit as I can't source the sleeves on there own so might end up buying a whiteline set.  Luckly i've got access to a press and 35 ton hydraulic puller/push kit that was designed for heavy plant bolt and bush removal, it breezed through getting them out.  

Its taking a lot of work doing every nut and bolt but I'm getting there and itching to get started on the rebuild........there’s another week before the shell’s back from the acid dippers so I'm waiting in trepidation of what its going to be like when it gets back.


Last edited by Pulsartim on 17th June 2018, 2:43 am; edited 3 times in total

53Restoration Project - Page 3 Empty Re: Restoration Project 24th February 2018, 3:51 pm

mike74

mike74

Cool, thanks for the info matey, much appreciated! Very Happy

54Restoration Project - Page 3 Empty Re: Restoration Project 2nd April 2018, 1:57 pm

Pulsartim

Pulsartim

So a quick update on the GTiR it came back from the dippers the other day........so with trepidation I went round to the body shop to see how bad it was.   I was pleasantly surprised how good the shell was, the rear arches are holed at the trim attachment bolt holes, the near side sill has a ten pence size hole an both front extension  side members need repairing due to jacking damage.  The rest of the major rust was confined to the lower portion of the front wings an the corner of the bonnet.  As the shell was sat in the corner I couldn't get any good pictures but once I get them emailed over from the body shop I'll post them.   The shell is off to be primed prior to going in for the weld repairs.  

So whilst the shell has been away I've been busy repainting the garage and installing a couple of additional lights which I could of done with when stripping the car over the dark winters nights.  I've also been restoring the other two parts of the prop shaft, engine mounts, clutch cylinder and power steering pipes.

Restoration Project - Page 3 Image12
Restoration Project - Page 3 Image13


Last edited by Pulsartim on 7th July 2018, 11:27 am; edited 2 times in total

55Restoration Project - Page 3 Empty Re: Restoration Project 2nd April 2018, 2:42 pm

johnny gtir

johnny gtir
moderator
moderator

Great news and standard of work keep up the hard work

56Restoration Project - Page 3 Empty Re: Restoration Project 3rd April 2018, 7:38 am

gtir_woody

gtir_woody
moderator
moderator

Looking great, prop shaft is one of the things I want to take off my car and freshen up.

57Restoration Project - Page 3 Empty Re: Restoration Project 15th May 2018, 9:00 pm

Pulsartim

Pulsartim

So I'm still waiting to get the pictures of the shell from the body shop but they called me in the other day, the paint which took ages to get an is matched to the VIN code was miles off when they shot the first coat on the doors an inside of the bonnet.  So I've decided to sod the paint the Vin code calls out an get a colour match to the original paint.

New paint on the top, original below.
Restoration Project - Page 3 Image14

I've been a little slack getting bits done in the last few weeks, but got the air-conditioning pump stripped an refurbed this past week. I was just going to polish the housing and paint the pulley, but then decided to pull it all apart, clean and paint the housing and pulley, re-nickel plated the hardware and reassembled this evening.

Restoration Project - Page 3 Img_2810
Restoration Project - Page 3 Img_2811
Restoration Project - Page 3 Img_2812
Restoration Project - Page 3 Img_2813


Last edited by Pulsartim on 17th June 2018, 2:45 am; edited 1 time in total

58Restoration Project - Page 3 Empty Re: Restoration Project 8th June 2018, 7:43 pm

Pulsartim

Pulsartim

So I finally got the pictures from the bodyshop so have decided to upload them so you car see the progress so far.   The bodyshop are getting on really well and it looks like the body will be back well before the August forecast date they originally estimated, so with this in mind i've been working in the garage getting the ancillaries ready for refit.

I thought I'd upload some pictures of the rust and rot prior to the shell going to the acid dippers.

Near side forward sill.
Restoration Project - Page 3 Img_2618

Nearside extension member with the obligatory jacking damage the offside was the same, these were pulled out and cut and repaired as required.
Restoration Project - Page 3 Img_2619

Near side rear arch, these ended up like a colander.
Restoration Project - Page 3 Img_2620

Offside rear arch.
Restoration Project - Page 3 Img_2621

The shell after coming back from the Acid Dippers and application of some protection primer, I was really surprised how little serious rot there was and the fact the shell seams were all braze welded.
Restoration Project - Page 3 Body_s33
Restoration Project - Page 3 Body_s35
Restoration Project - Page 3 Body_s34
Restoration Project - Page 3 Body_s37
Restoration Project - Page 3 Body_s36

Body after 24 hours of welding, the main areas needing attention was both rear arched both forward sills, front wings where they touch the sills, one corner of the bonnet and both forward extension members.
Restoration Project - Page 3 Body_s38
Restoration Project - Page 3 Body_s43
Restoration Project - Page 3 Body_s41
Restoration Project - Page 3 Body_s39
Restoration Project - Page 3 Body_s42
Restoration Project - Page 3 Body_s43
Restoration Project - Page 3 Body_s40

Once the bottom, engine bay and interior of the car welding was finished and the etch primer had been applied we opt'd for a U-Pol Raptor coat as this can be coloured to the same colour as the car unlike regular stone chip.  Raptor has the added benefit that it is flexible when absorbing impact but is a hard as rock.
Restoration Project - Page 3 Body_s25
Restoration Project - Page 3 Body_s26
Restoration Project - Page 3 Body_s27
Restoration Project - Page 3 Body_s28
Restoration Project - Page 3 Body_s29
Restoration Project - Page 3 Body_s30
Restoration Project - Page 3 Body_s31
Restoration Project - Page 3 Body_s32

59Restoration Project - Page 3 Empty Re: Restoration Project 9th June 2018, 1:15 am

gtir_woody

gtir_woody
moderator
moderator

Nice update mate, bet you are getting excited seeing the progress

60Restoration Project - Page 3 Empty Re: Restoration Project 9th June 2018, 3:32 am

Pulsartim

Pulsartim

Yeah I can't wait to get going on the rebuild, the exterior top coat was shot last week an the finish their sprayer got was amazing the body has never looked like that even when I first got the car.  I've got a lot more picture to upload but I need to figure out what's wrong as I keep getting an error message when I try to upload them.

61Restoration Project - Page 3 Empty Re: Restoration Project 9th June 2018, 5:31 am

johnny gtir

johnny gtir
moderator
moderator

Great progress as above you must be well happy

62Restoration Project - Page 3 Empty Re: Restoration Project 9th June 2018, 8:24 am

Ryaneg6freak

Ryaneg6freak

Good god, that's a surefire way to ensure you'll never have an issue with rust ever again. I love Upol products, they're fantastic and I love that you color matched it to the body. I probably wouldn't have Upol-ed the engine compartment, I like a little more gloss in there, but damned if that isn't a beautiful job! Once I get my forever garage built, my car is coming down this far as well.

63Restoration Project - Page 3 Empty Re: Restoration Project 9th June 2018, 8:54 am

Ryaneg6freak

Ryaneg6freak

Do you have any pictures of the metal repair after the shell was stripped? I know you had mentioned the pinch welds were damaged and there was some internal frame rust, just curious if you'd needed to do anything else.

64Restoration Project - Page 3 Empty Re: Restoration Project 9th June 2018, 9:21 am

Pulsartim

Pulsartim

There’s a couple of long shots of the bare shell but to be honest there’s not much to see, apart from the areas of rot I’ve said there wasn’t anything else apart from rebonding the roof panel to the internal roof bars. The signs of rust inside the sills and the rear arches left a little pitting but they were still sound.

65Restoration Project - Page 3 Empty Re: Restoration Project 9th June 2018, 10:05 am

Pulsartim

Pulsartim

As I posted previously the Vin code paint code was incorrect for the external of the car, after much searching we found this was for the engine bay internals.  After colour chipping the plastic trim of which I knew hadn't been repainted in the 18 years i've had the car we got the correct paint and it was shot last week.  There were a couple of areas that I had reworked but to be fair the finish is outstanding an I was being super critical of the painters work, anyway all the items have been corrected.   Next the engine bay is being painted the correct shade of matt grey this coming week.

Restoration Project - Page 3 Body_s10

Restoration Project - Page 3 Body_s11

Restoration Project - Page 3 Body_s12

Restoration Project - Page 3 Body_s16

Restoration Project - Page 3 Body_s17

Bumpers and skirts in prep.

Restoration Project - Page 3 Body_s13

Restoration Project - Page 3 Body_s15

Restoration Project - Page 3 Body_s14

Finished bumpers and trim.  The depth of the gloss on the rear bumper had me stunned when I first saw it.

Restoration Project - Page 3 Body_s18

Restoration Project - Page 3 Body_s21

Restoration Project - Page 3 Body_s19

Restoration Project - Page 3 Body_s20

66Restoration Project - Page 3 Empty Re: Restoration Project 9th June 2018, 11:40 am

Ryaneg6freak

Ryaneg6freak

How was your engine bay not the same color as the body? I can't say I've ever seen that on a factory Pulsar before. I know for certain my entire body is one color, inside and out.

That looks fucking amazing though.

Mine is KJ7 Ivory throughout, is yours not TJ1?

67Restoration Project - Page 3 Empty Re: Restoration Project 9th June 2018, 12:18 pm

mike74

mike74

My TJ1 has a lighter grey colour in the engine bay too...dunno why, seems odd

68Restoration Project - Page 3 Empty Re: Restoration Project 9th June 2018, 2:10 pm

Pulsartim

Pulsartim

Yeah the grey ones all seem to be a different grey inside the engine bay from the factory not sure why......needless to say I’m going to do mine as factory as I can.

69Restoration Project - Page 3 Empty Re: Restoration Project 9th June 2018, 4:46 pm

nomad

nomad
Admin
Admin

Excellent work mate thanks for the updates thumbsup


_________________
"Official post whore" and all round superhero....

70Restoration Project - Page 3 Empty Re: Restoration Project 9th June 2018, 4:49 pm

nomad

nomad
Admin
Admin

I've gave you a rep point also Wink


_________________
"Official post whore" and all round superhero....

71Restoration Project - Page 3 Empty Re: Restoration Project 10th June 2018, 7:27 am

Pulsartim

Pulsartim

Thanks for that.......with the rebuild in sight there’s a few items I haven’t worked out how I’m going to address the heat shield under the fuel tank an the one where the back box sits need some love an attention. I’d love them chromed but I’m not sure if the ones I have are salvageable. Also I need the 3 ridged fuel lines that run down the near side floor pan, I think I’ve found some tubing that’s the drab green but I need to spec up the sizes this week. I had a good score on the ridged brake pipes I found a company in the USA that had steel brake piping the correct spec an colour as the original.....that was delivered the other week along with stainless unions for the pipes.

Restoration Project - Page 3 Cc281b10

72Restoration Project - Page 3 Empty Re: Restoration Project 10th June 2018, 8:58 am

Ryaneg6freak

Ryaneg6freak

Pulsartim wrote:Yeah the grey ones all seem to be a different grey inside the engine bay from the factory not sure why......needless to say I’m going to do mine as factory as I can.

Interesting. I'm about to pick up a TJ1 roller and I never really noticed that, I'll have to take a look when I get a chance.

73Restoration Project - Page 3 Empty Re: Restoration Project 28th June 2018, 9:03 pm

Pulsartim

Pulsartim

I got the car back from the bodyshop today and she's looking really good in the summer sun. Front and rear screen refitted with new genuine seals.

Restoration Project - Page 3 Img_2810

Restoration Project - Page 3 Img_2811

Restoration Project - Page 3 Img_2812

Restoration Project - Page 3 Img_2813

Restoration Project - Page 3 Img_2814

Restoration Project - Page 3 Img_2910

With the return of the shell and the sun beating down I set about cleaning the main loom up especially the OS front arch an engine bay parts.  It was soon installed and I set about dressing the engine bay, the new brake pipes i'm making started to slow things down but I got on really well.

Restoration Project - Page 3 Img_2912

Restoration Project - Page 3 Img_2911

74Restoration Project - Page 3 Empty Re: Restoration Project 29th June 2018, 7:39 am

Ryaneg6freak

Ryaneg6freak

My god man, that looks so good!

75Restoration Project - Page 3 Empty Re: Restoration Project 29th June 2018, 8:07 am

mike74

mike74

yeah that looks stunning in the sun mate...wish my grey one looked that good!

Sponsored content


Back to top  Message [Page 3 of 6]

Go to page : Previous  1, 2, 3, 4, 5, 6  Next

Permissions in this forum:
You cannot reply to topics in this forum