
 Latest images


In this occasion we are fitting the Walbro 255 Fuel Pump
Preparation
Run your tank low enough to get you to the nearest fuel station, it makes the job a lot cleaner and safer for your hands, they are going to be submersed in petrol for a time.
You will need:
A 10mm socket.
Crimping tool for the two wires, or similar.
Some tie wraps to secure the fuel pump, plus other “space” filling material.
I used a large piece of rubber hose, as will be seen later, but there maybe other more elegant ways of doing this, depends on what’s available and how much time you want to spend making it elegant never having to see it again!!
The fuel system will likely be pressured up, so it is a good idea to relieve this pressure, you can either just live with petrol coming out of the pipes when you take them off, and there is quite a bit, but that gives you a nice petrol smell in the car afterwards!! Or you can take a pipe off the fuel filter and let it go on the floor up front.
Fitting Sequence
First locate the fuel tank access, in the boot under the carpets, fold back the carpets, easier if you fold the seats forward.
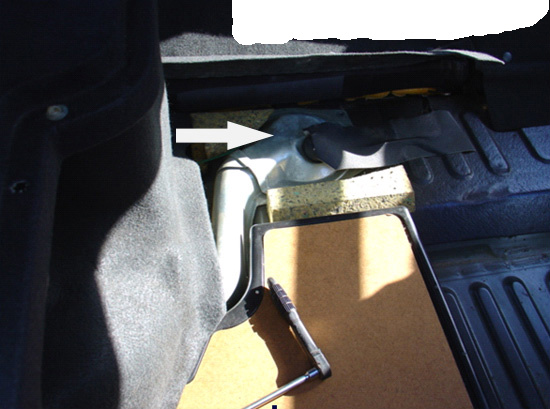
Take off the cover plate by unscrewing the 5 screws around the edge, maybe a bit stuck this is not a problem just give it a bit of harder pull, after years of being there it gets stuck.
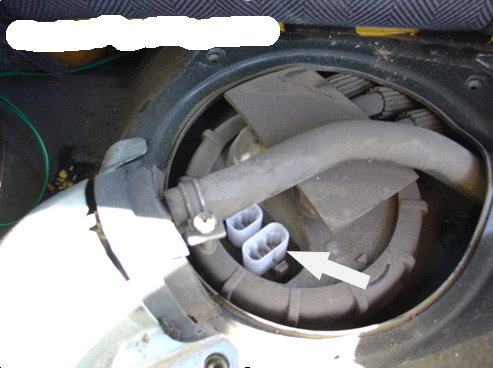
Unclip the electrics and where shown below
Now loosen the large outer “black” nut like collar holding the access in position, use a piece of hard plastic or wood and hammer, be gentle with it, although you have to hit it hard enough to make it turn, at least initially, you should then be able to rotate it by hand, watch the big rubber seal, that plays an important part in keeping the fuel in the tank and the fumes in too, mines clean because of all the fuel that shot out of the pipes when I took them off
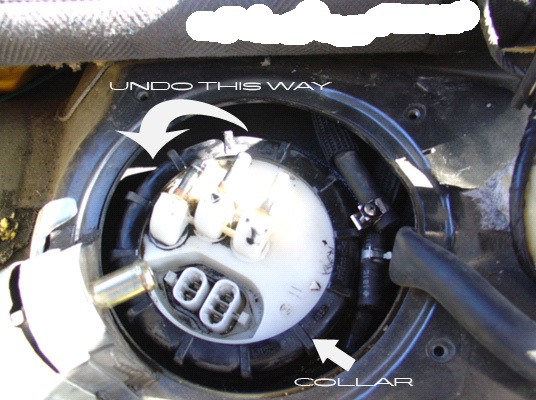 !!
!!Once it’s loose remove the pipe work from the unit, don’t worry too much about what comes from where as the pipes are of different sizes and it is fairly obvious where they come from, you can of course make them if you’re worried.

Fold back the pipes and gently remove the unit from the tank, be careful, it has wires and pipes attached underneath; they need to be disconnected before you can remove it completely from the car.

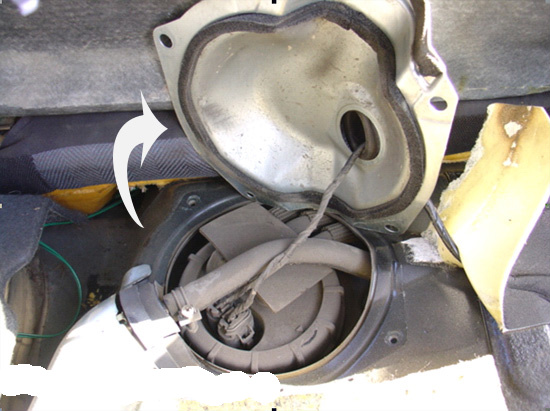
Once removed from the car you will see the fuel pump in the tank, quite a way down in the tank, it is in a housing that “clicks” into the holder which is attached to the tank… it should be just a matter of getting your hand, but you have to pull or yank quite hard so watch out when it does eventually lets go cos it hurts when your hand hits the side of the opening!!!
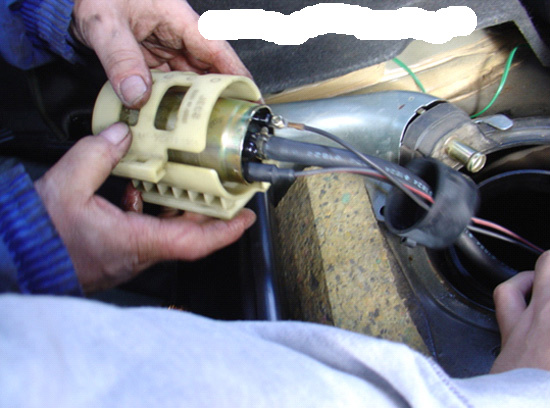


NOTE: This picture above is actually the new one after fitment, the original one looks like this below, picture is just to show where it is in the tank.
Once you have the pump on the table you can see what job is at hand, make a note of where the original filter is before you take it off, I found that the one that came with the new pump couldn’t be used, I adapted the old filter onto the new pump, you also have to loose the rubber gaiter on the front of the old pump.

The housing where the exit of the pump sits has to be modified a little to allow the new pump to sit squarely in the existing holder, it takes a little time but don’t cut too much out.

The new pump is then arranged so that it sits in the holder, secure it best you can so it doesn’t wobble around, it has to be secure as you do not want the pump to “rotate” in the tank… filter would then be pointing up in the air, not desired.

Once the pump is secure, join the two wires together crimp or secure as well as you can, and then start too re-fit in the reverse order.

Re-fit all electrics and pipes before fitting into tank.
Re-fit electrics and pipes after tightening the black securing ring on top of the access point, ensuring that the rubber seal is in the right place in the hole.
Tighten the ring until tight, then re-connect electrics, pipes, and re-secure the cover plate.
Put the carpets back, shut the boot, clean your hands and start her up, when you first switch on it will take a little longer to pump up, plus you shouldn’t hear too much either,