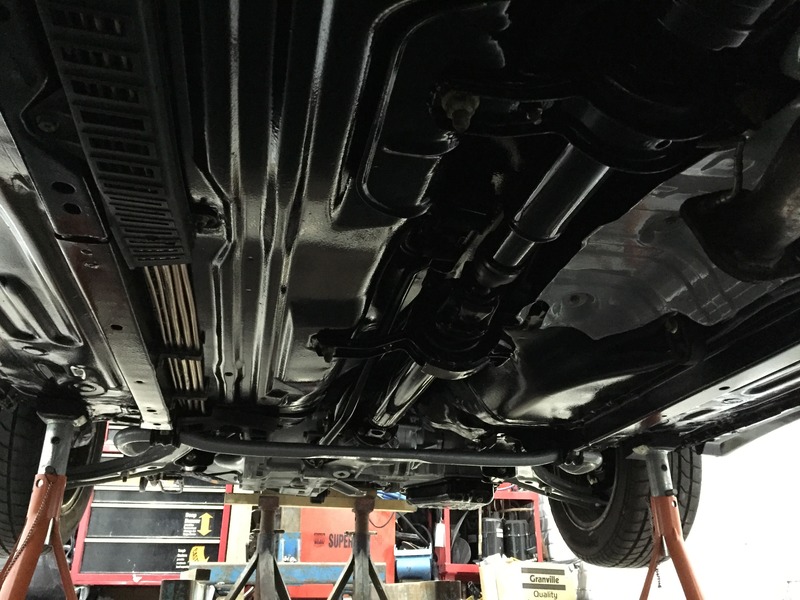
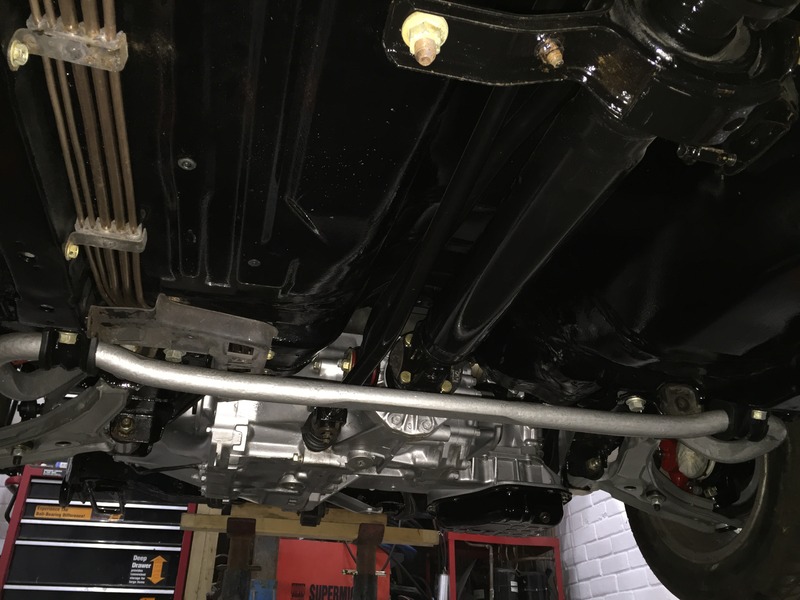
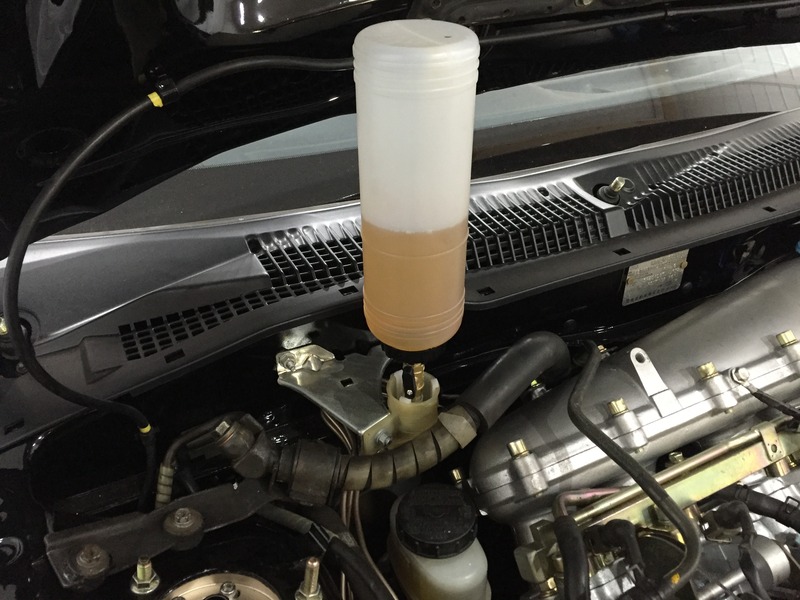
Gtir Motorsport club
Would you like to react to this message? Create an account in a few clicks or log in to continue.
Gtir Motorsport club

Welcome to the largest Nissan Pulsar & Sunny GTI-R Forum. Masses of info, friendly members, cars for sale, lots of spares. Best forum on the net by far. Everything your gtir needs is here.


You are not connected. Please login or register

Restoration Project

+19
Cosmic73
toaster55
wrc
Stu
robins
MartyMG
Mr B
Andy Sunny Gti
mikewazowski
Ajay.
gtir_woody
PartyPete
knights of nee
Gaz GTiR
nomad
buckym120
GTI-R US
johnny gtir
burrows1980
23 posters

Go to page : Previous  1, 2, 3, 4, 5, 6  Next

Go down  Message [Page 3 of 6]

51Restoration Project - Page 3 Empty Re: Restoration Project 15th May 2016, 7:40 pm

burrows1980

burrows1980

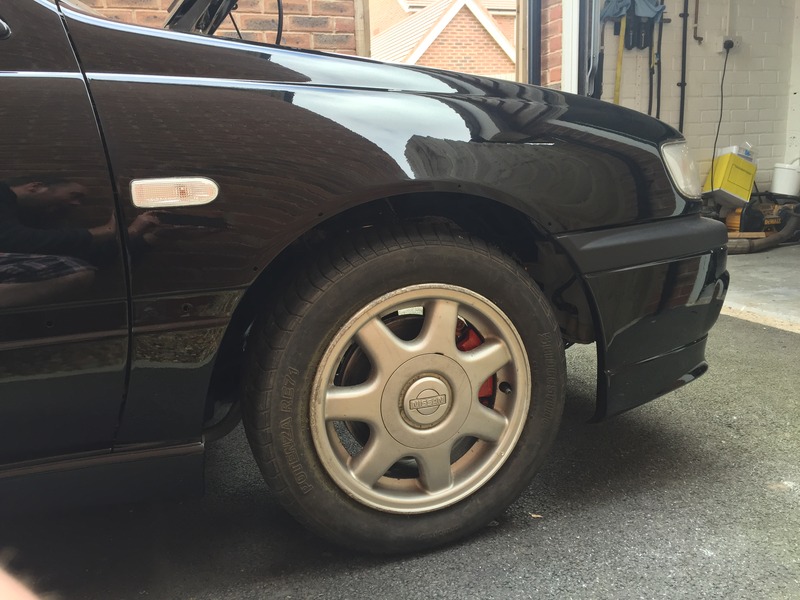
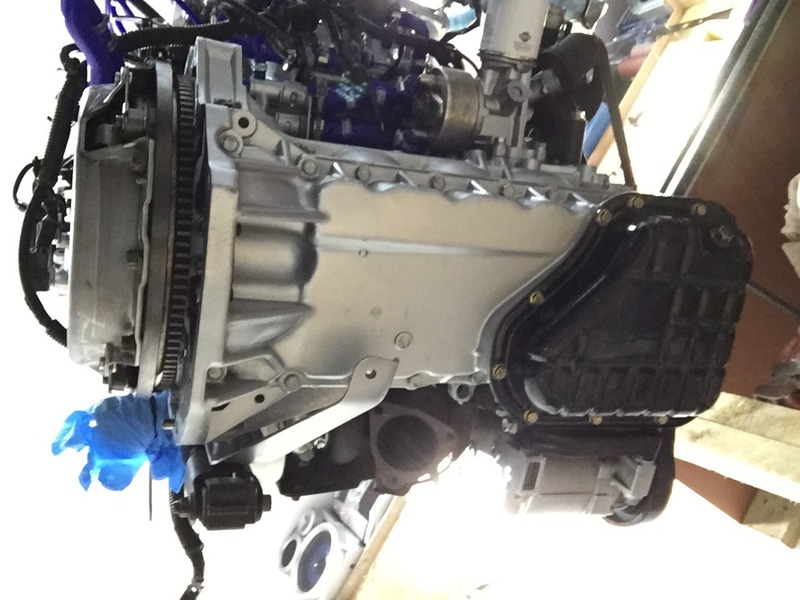
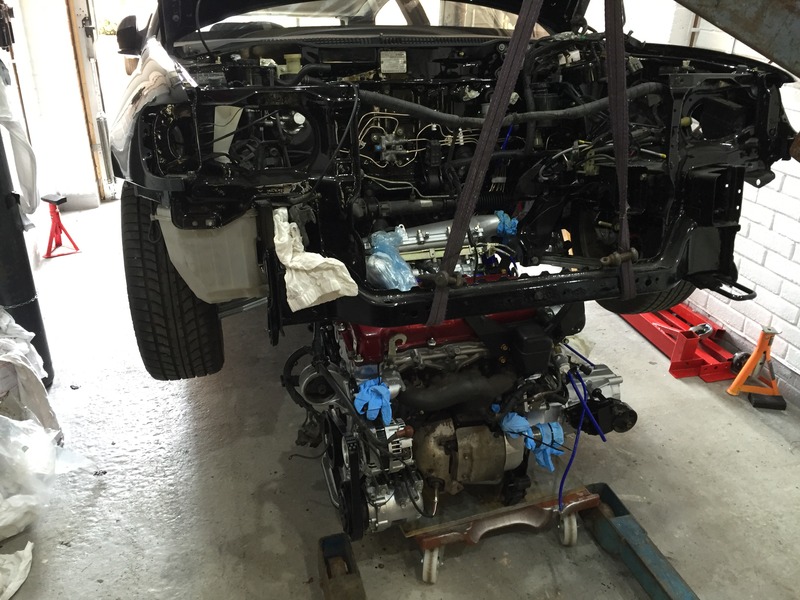
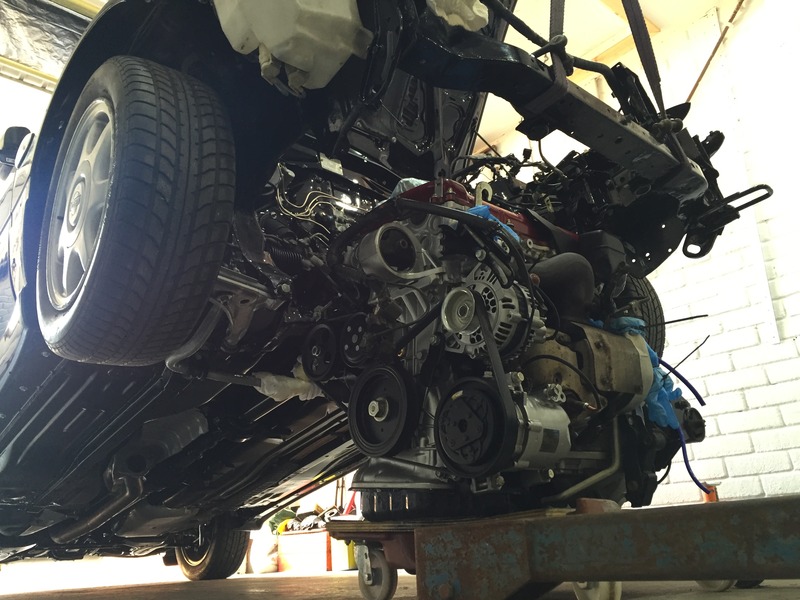
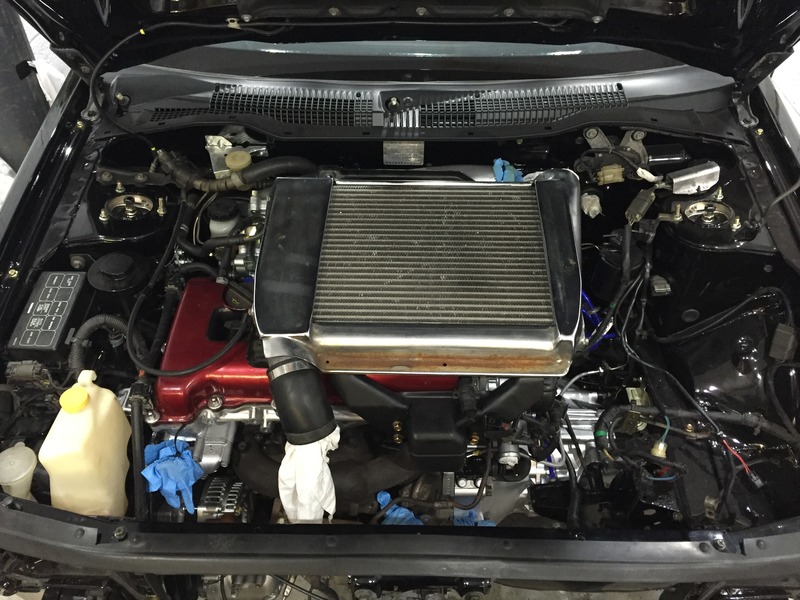
Here's my last update for a while, so nearly finished it as well, but Nissan let me down on two oil gallery bungs! Oh well..

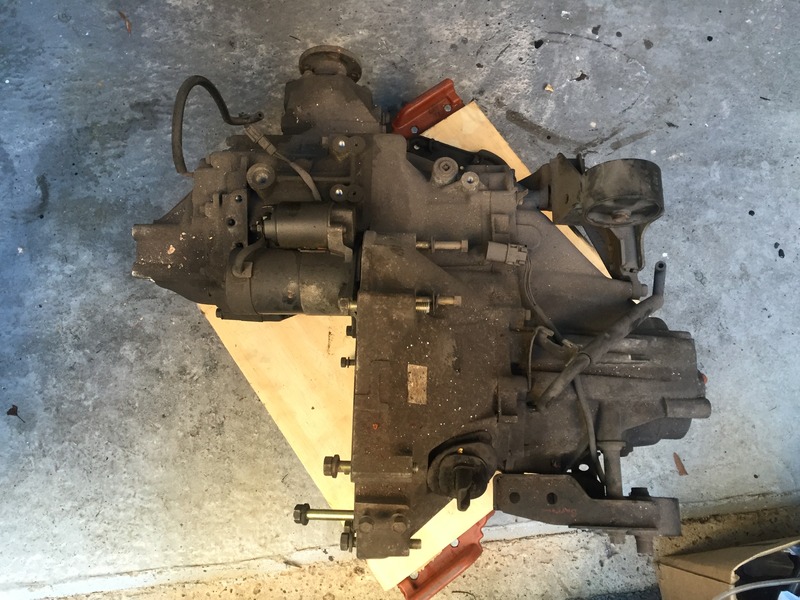
So since the last update of the shell pretty much finished I started on the engine.  Stripped the thing down with the intention of only doing the head but once removing the head and discovering a spare shim balanced on the oil gallery return of the block! Intrigued I decided to strip the whole lot down, then the ocd cleaning started, acid dipped parts and zinc plating again Laughing

Restoration Project - Page 3 5197F532-B248-4EB2-B9C7-5057C827DF98_zpsxjbbnsx0

I always did regular oil changes and was happy to discover no burnt on oil, and generally in very good order.

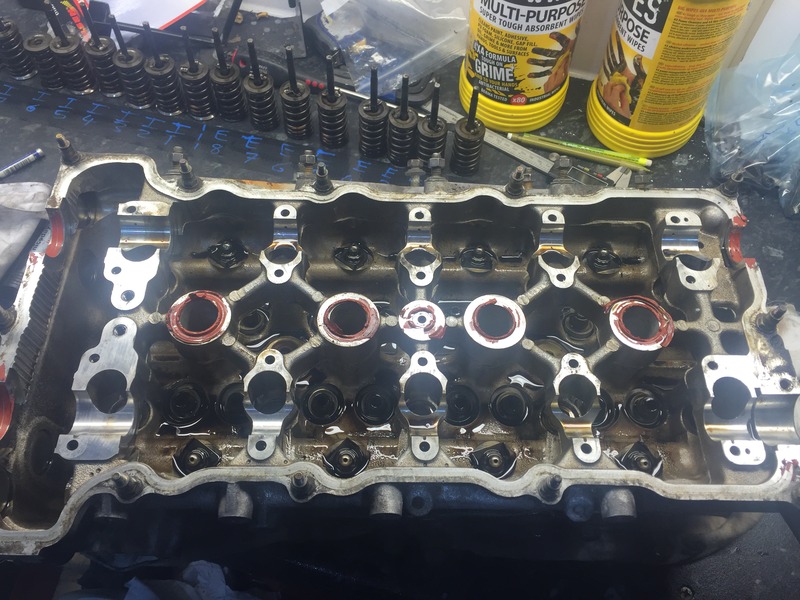
Stripped the head down, kept everything in order, measured cams, valve stems and anything else that was worth measuring.  Give the head a soak in a Screwfix special degreaser.  Can't believe how good the stuff is, only £7.99 bargain better than gunk in my opinion.

Restoration Project - Page 3 A4667411-0E6B-4A21-87BB-F0CB684E77D9_zpsvzomcxby

Restoration Project - Page 3 D97F2EB4-5A8E-4746-AE87-47E8C4007D1C_zpsmhh7dma9

Boom

Restoration Project - Page 3 E53C4FCD-9AC3-45FE-8A8C-366D40B6F965_zps3tbt855c

Said it was good stuff Laughing

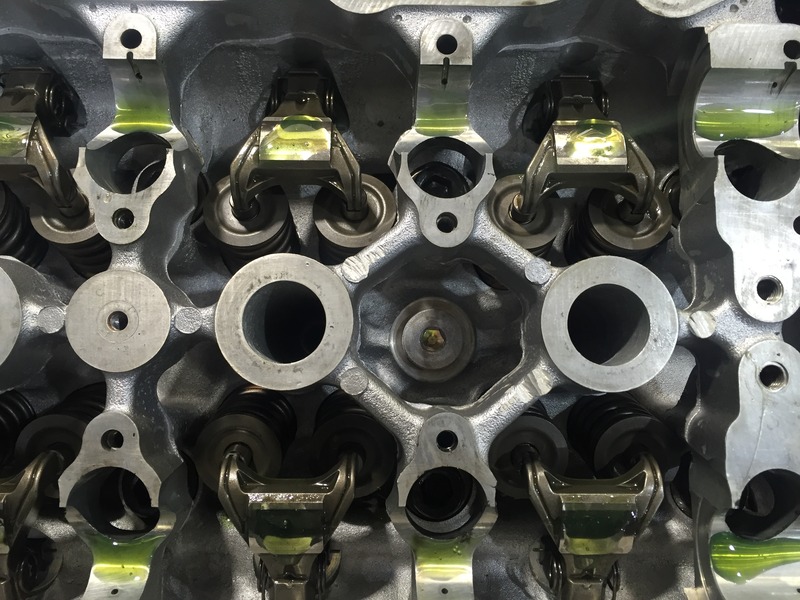
I kept a storage heater element from an old storage heater I stripped out in work to heat it up in a bucket, worked a treat.  So after cleaning the head and happy with the condition of the block face I moved onto grinding in the valves, in all honesty it's the best valve seat I've seen in all the engines I've ever striped down, very little pitting and the valves also in good shape, cleaned the valves up on the lathe before lapping them in.

https://www.youtube.com/watch?v=-6Cf9dhckcA

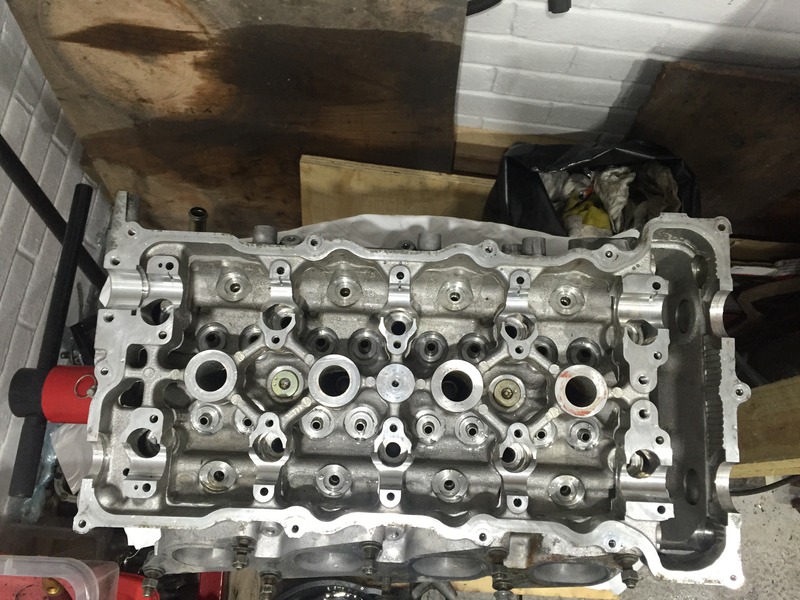
Once all lapped in the head was built back up including reshiming the head with a modified Sealey hole punch and using high quality blades.  Used assembly Lube over everything and packed away in a airtight bag, well nearly air tight Laughing

Restoration Project - Page 3 3EC6D9C8-8C21-4840-A71C-ECD09F0D5ABD_zpsyn0ccw5g

And yes before anyone comments, I built it up on the kitchen table while she was in work Laughing

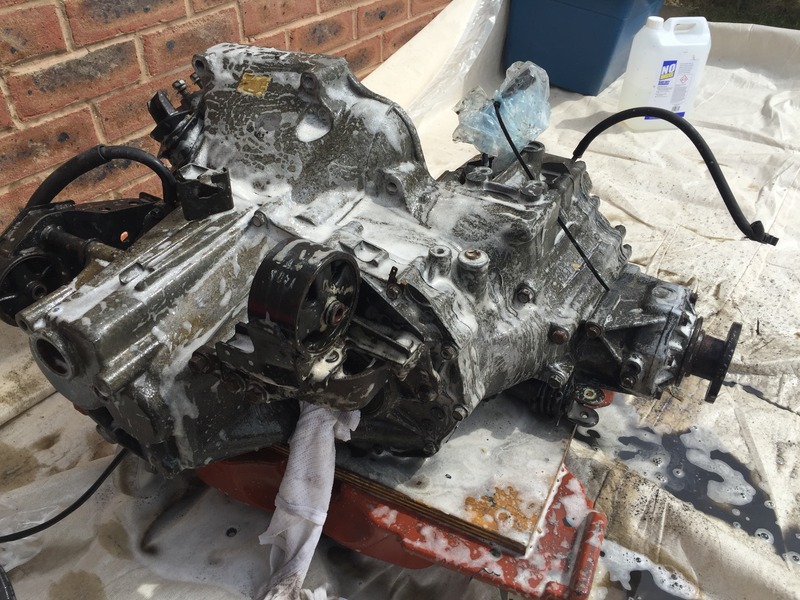
So then my attention moved onto the block, again heated the degreaser up and dumped the block in a under bed storage contain from B&M Laughing fitted perfect, got all the crud off then jet washed it fully, oiled the bores to stop rust. Didn't have a bag big enough so put it back onto the engine stand covered over.

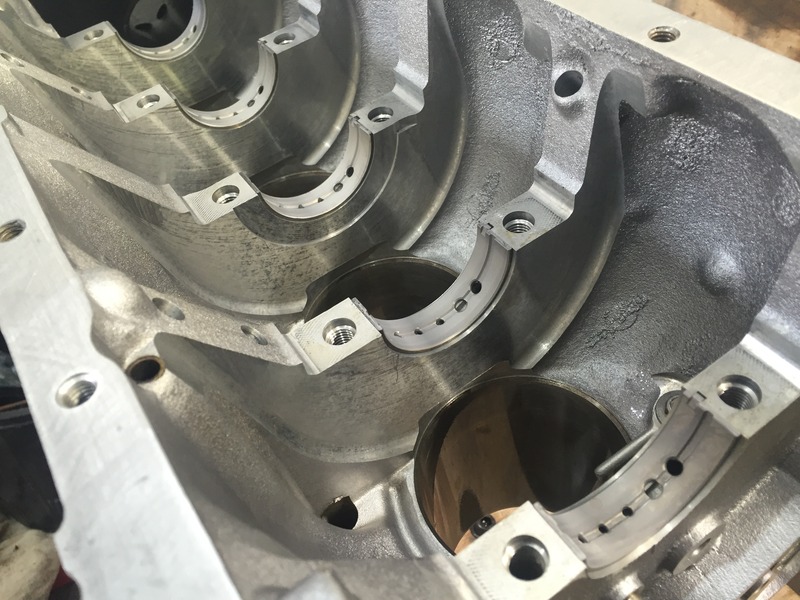
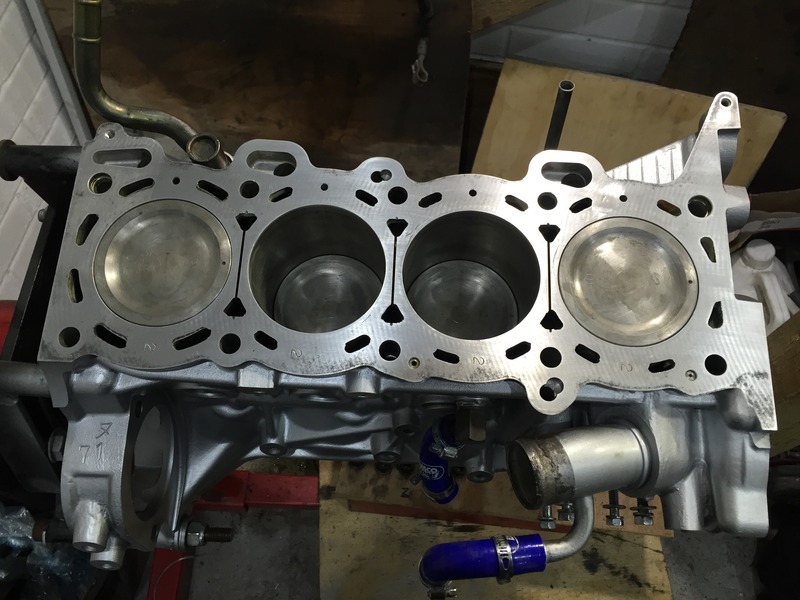
I deglazed the cylinders just before assembly commenced, mainly due to any light surface rust that had built up over the 3 months would be removed.  Once deglazed another full wash to remove any tiny particles of metal.  I’m no expert in deglazing and only ever done two blocks before, somehow this one made me very nervous!  I won’t go into the method of how I did it, but it looked pretty spot on after, if the rings don’t seat right after then so be it, but I set out to do the whole build on my own so hopefully it works out that way and I don’t get a lot of egg on my mush!

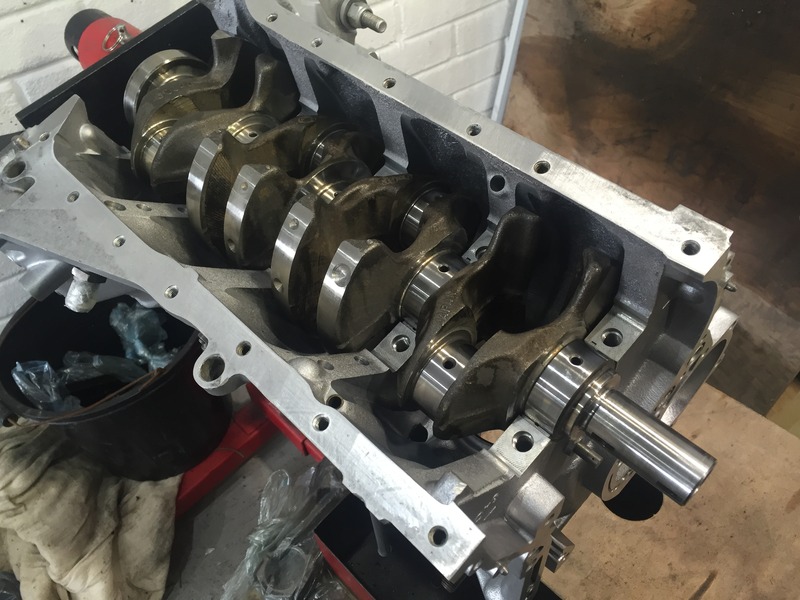
When removing the crank, I put it into a rubble sack (without rubble), and covered it in oil to stop rusting, should have measured it before doing this, became a very messy job! But got it all measured and was within spec, then had the dilemma of what bearings to order, you may recall the thread I started of the part numbers I needed but what was stamped on the shell was different!  

http://www.gtir-motorsport-club.com/t6294-selecting-big-end-bearings

Turns out when I got the new bearings they had different part number on to what I ordered and were the same as the ones removed… It took Nissan an age to get the big end bearings in, think it was around 8 weeks in the end.

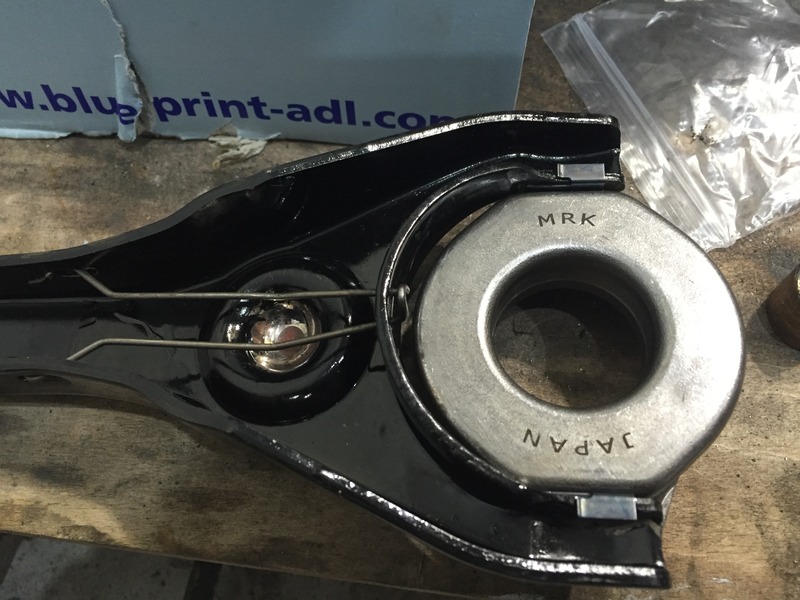
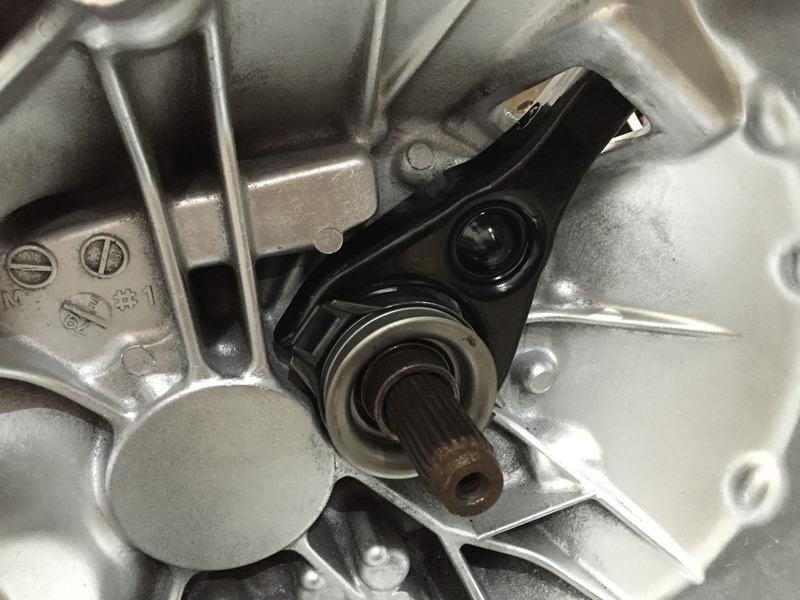
Moved onto checking the oil pump, again all clearances measured in spec, very slight pitting in the pump but very minor, should get a few more miles out of it.  

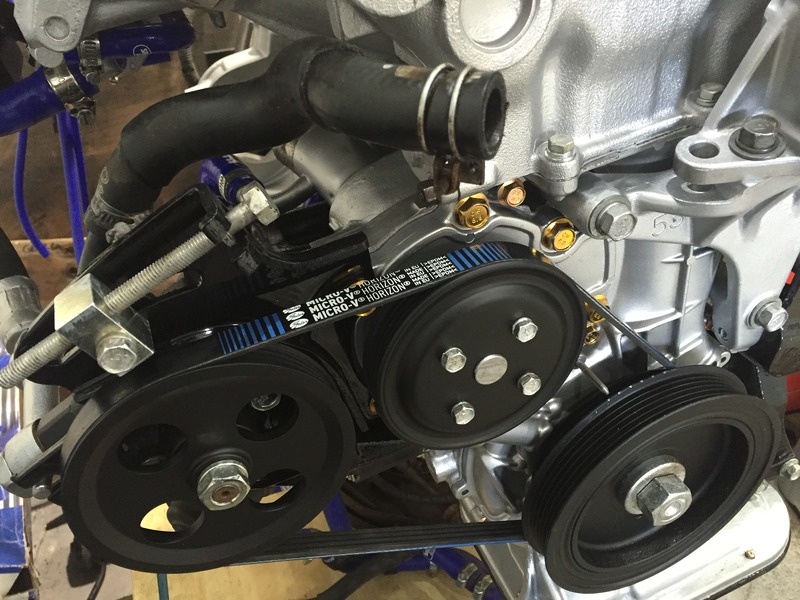
Something that’s always bothered me was a high idle that slowly came about a few years back.  Had the throttle bodies off about 5 years ago to replace the hoses with Samco before they split etc.  Noticed the butterflies had daylight around them when shut, thought that can’t be right, but at the time didn’t know how to cure it.  This time I’d already done loads of research and put a new seal around the edge of the butterflies using Molykote 321.  For once I should be able to actually use the idle screw!  Before I took it off the road the idle screw couldn’t go in any further but still idled around 2k rpm.  All vacuum hoses replaced, pcv valve removed and blanked etc etc etc, but still couldn’t cure it.

When stripping the throttle bodies down and looking at how they work and how the IACV works it made so much sense that the butterflies letting air past when supposedly shut will of course increase the rpm.  The original grey seal on the butterflies over time wears away, which mine did, from the photos I took 5 years ago to the ones now even more had worn away.  With the application of Molykote, no light can be seen through them, each throttle body has its own air hole between butterfly and cylinder fed via the IACV so will have the correct amount of air fed into each cylinder for idling.

Restoration Project - Page 3 28C6D00A-2FB4-4F2B-97DA-470F2BFFC403_zps5lrkrbou

Restoration Project - Page 3 C5582DB9-27FF-4E9F-B685-263E189F0544_zpsamlyrfpz

Restoration Project - Page 3 FE488C91-D18E-41FA-8228-3B9075AC615D_zpsjfcpzr7c

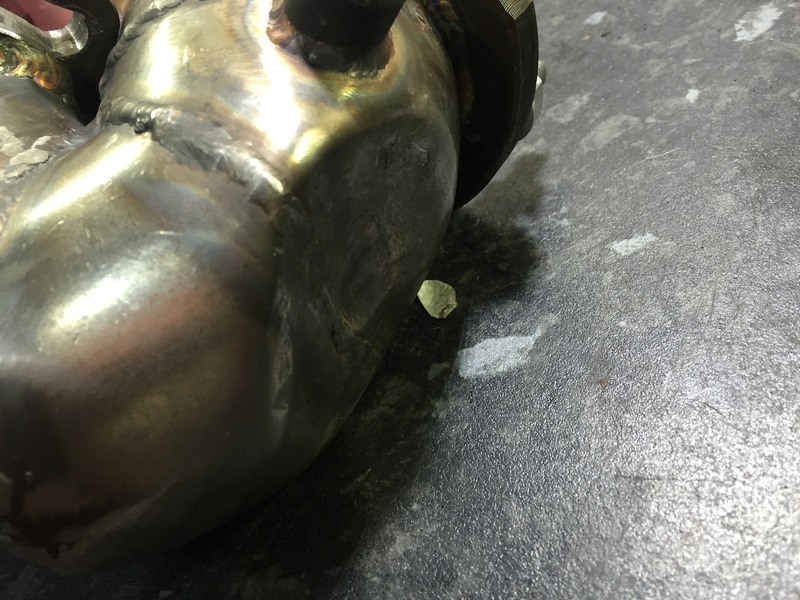
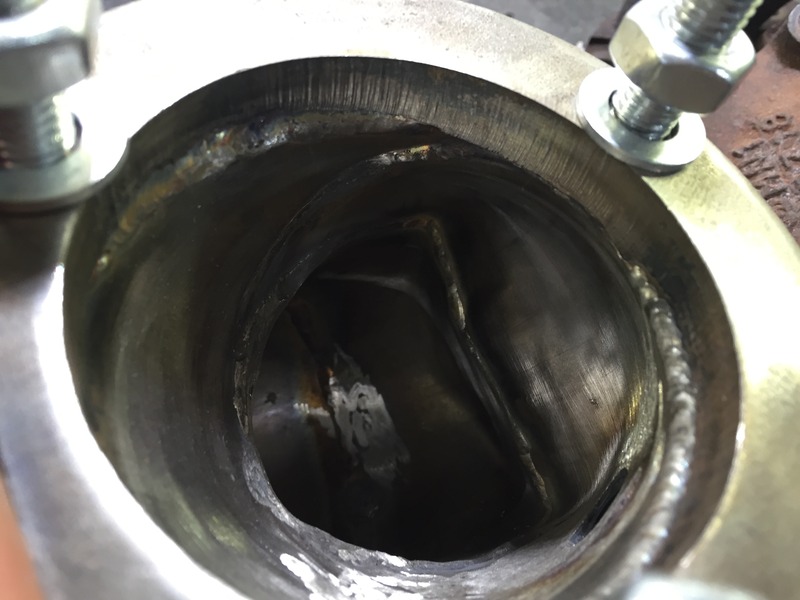
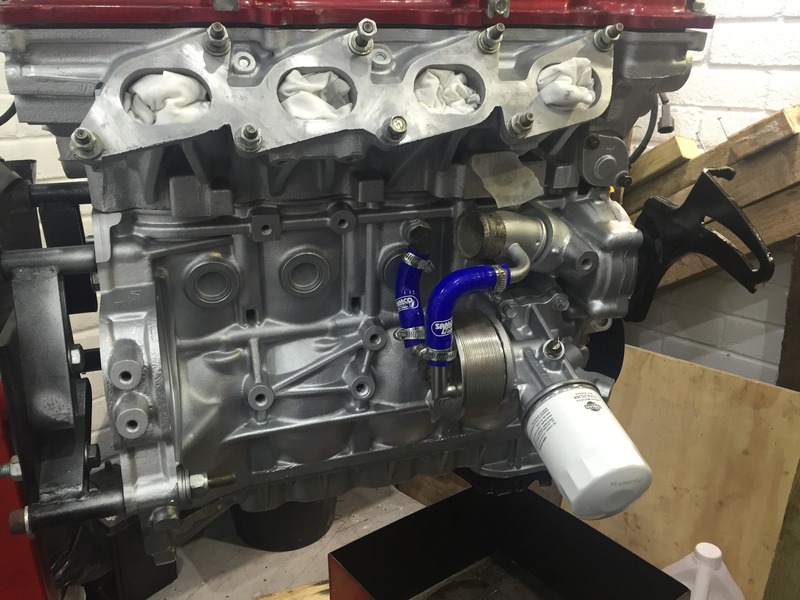
Turbo was the next job, originally I wanted to go with a New Hybrid CHRA from Turbo Rebuild, but with finances getting tight I decided to rebuild it myself, got a 360 rebuild kit of achem ebay, sent the shaft off to turbo rebuild for balancing.  Once back rebuilt it up.  I only need the turbo to last a year or so, then hopefully once finances get a bit easier I can go with the hybrid turbo. I used this guide for stripping the turbo and assembling it:

http://www.sr20forum.com/turbo-guides/254779-how-rebuild-t25-t28-turbo.html

Restoration Project - Page 3 8E64C151-82CE-47FE-BEA1-6736A2F18DAD_zpsvjfwbc0n

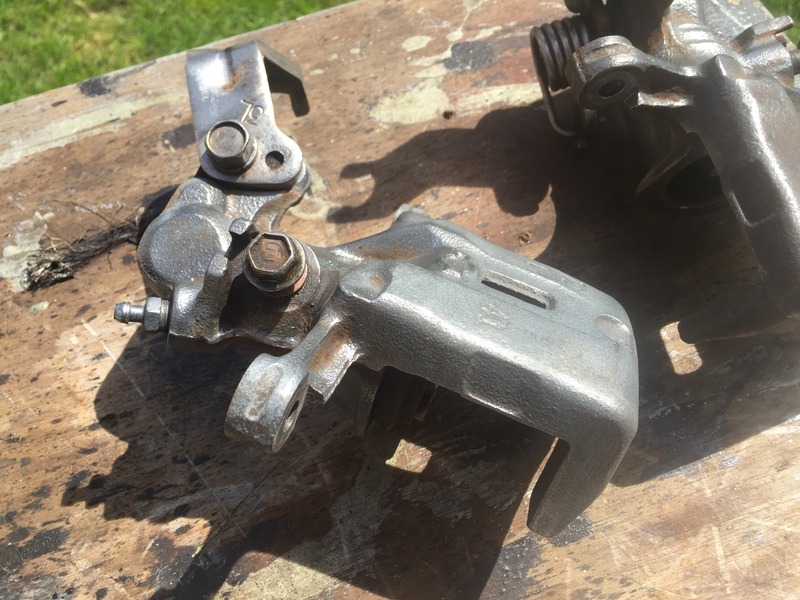
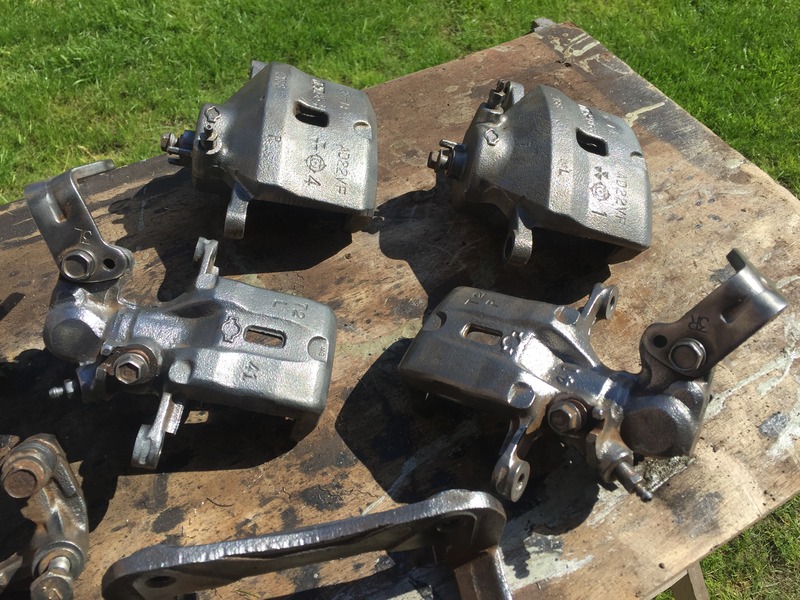
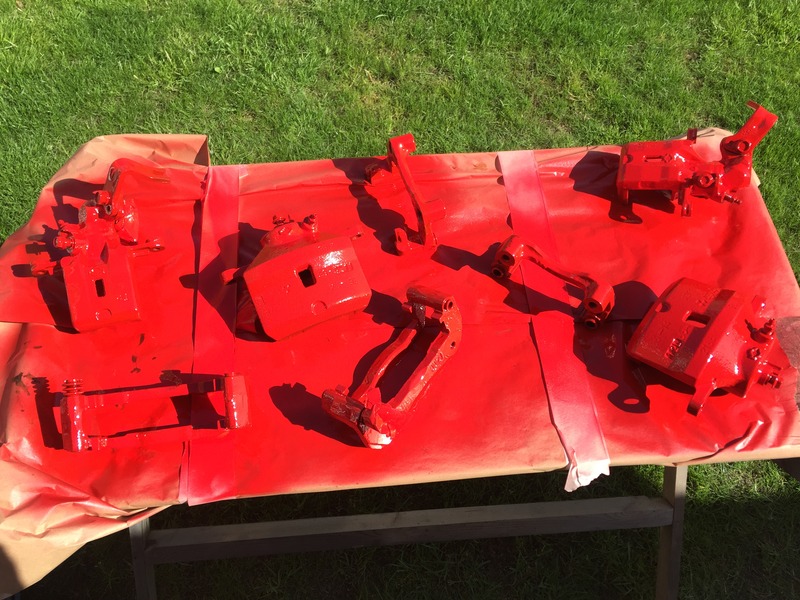
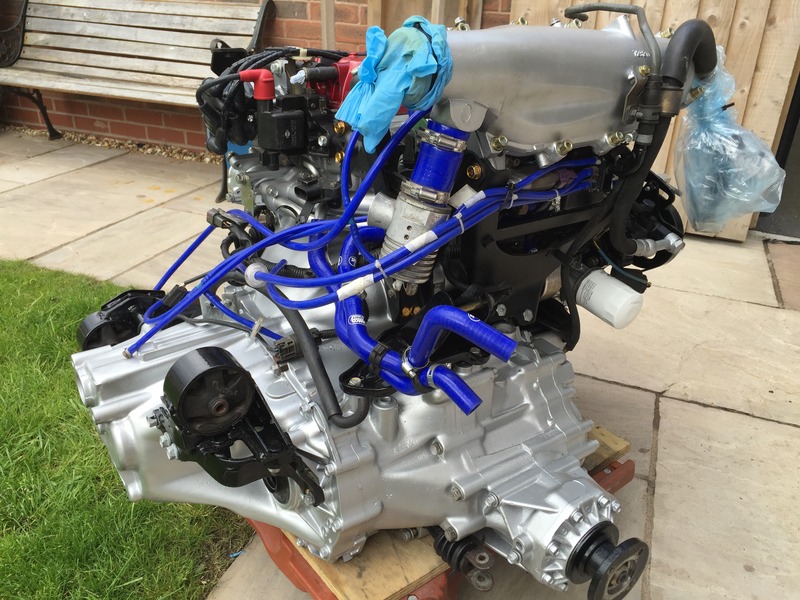
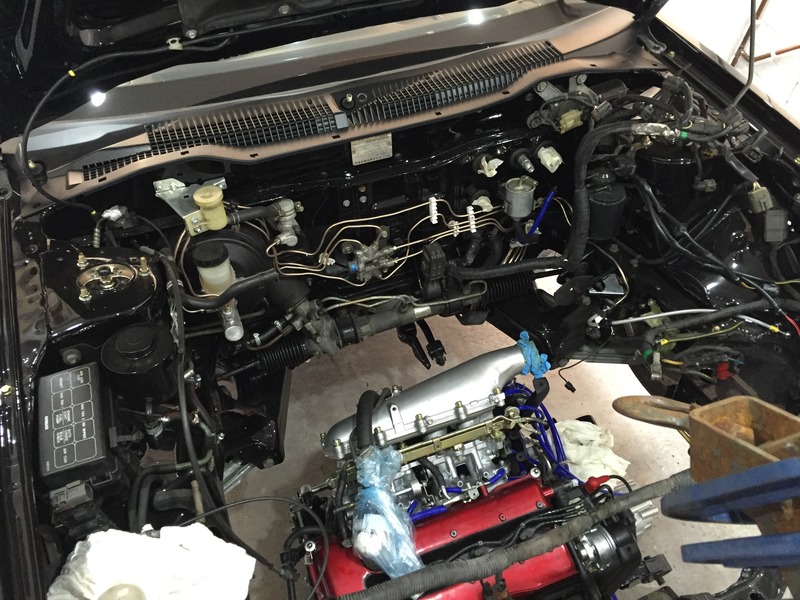
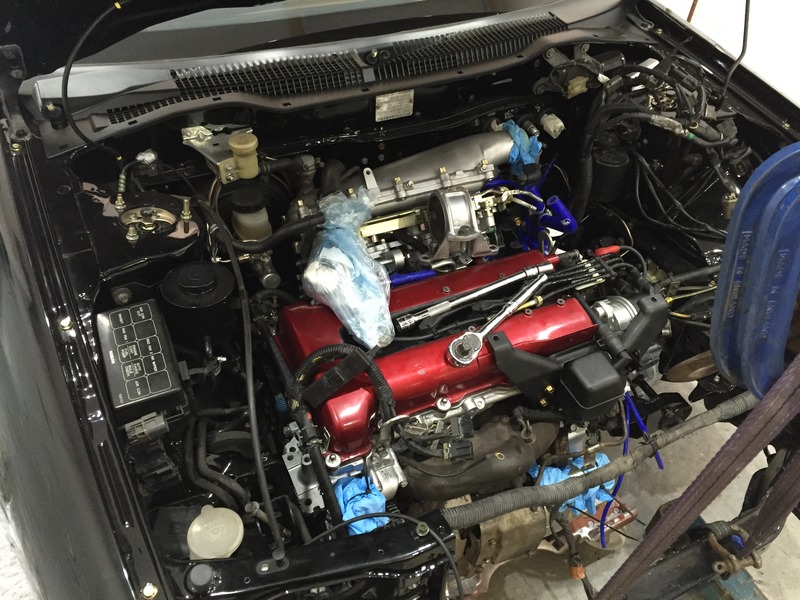
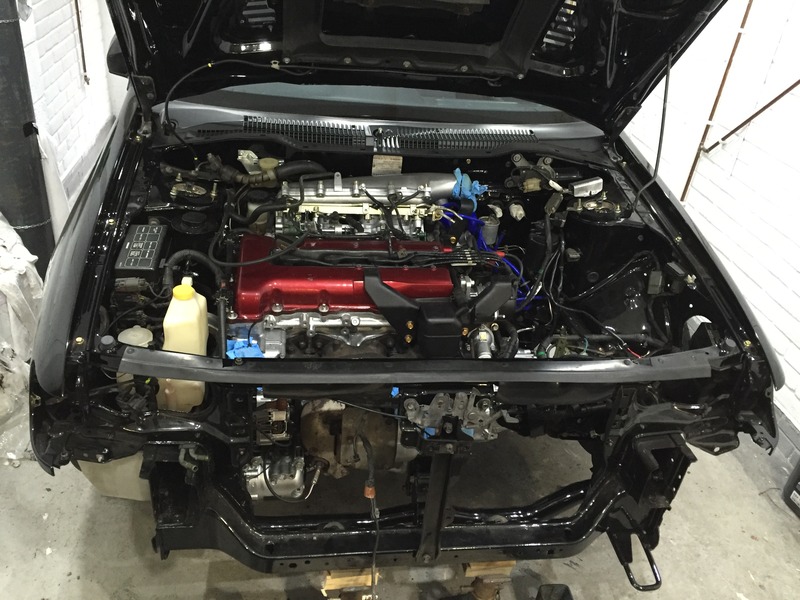
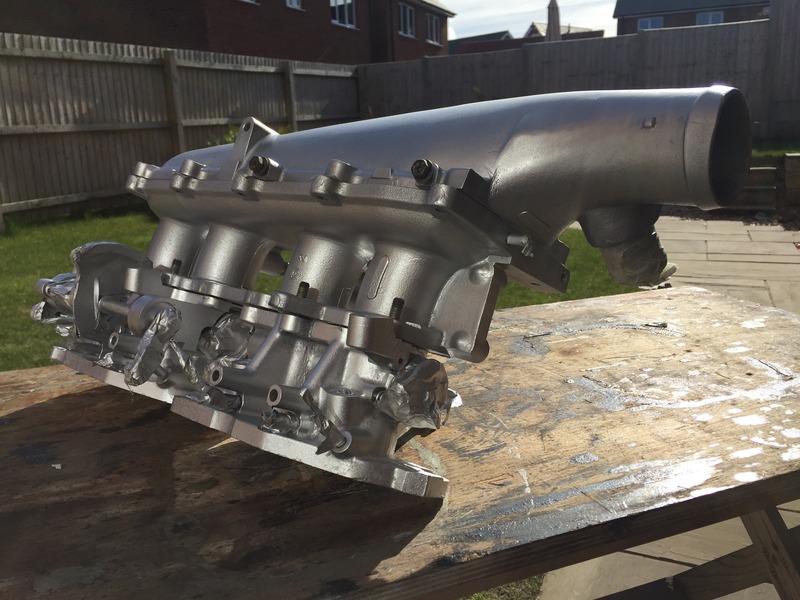
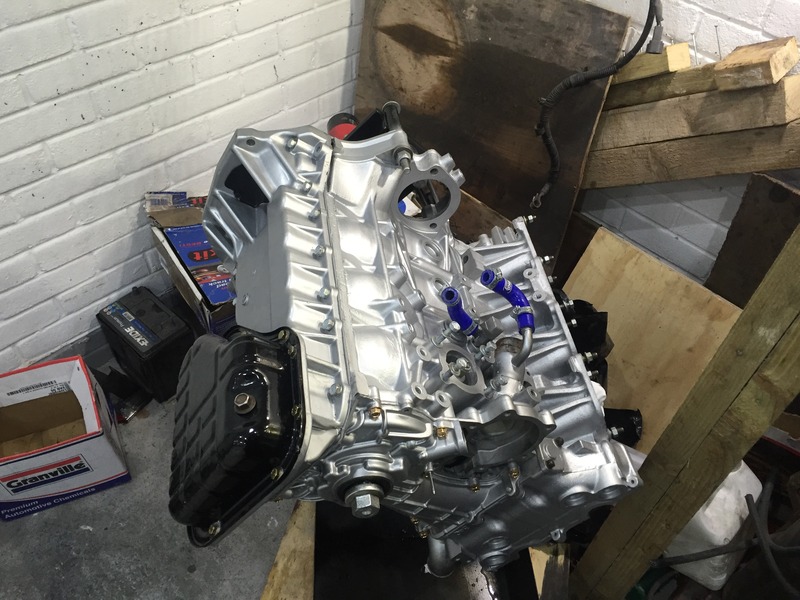
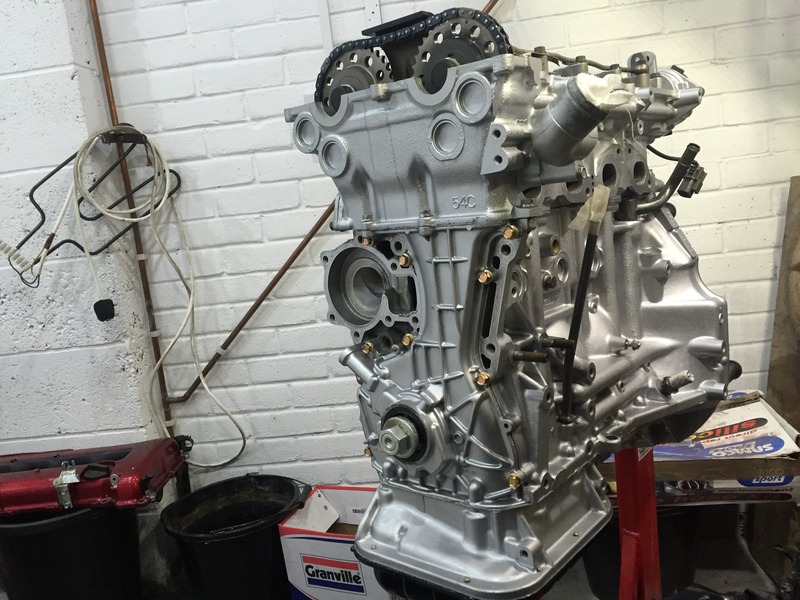
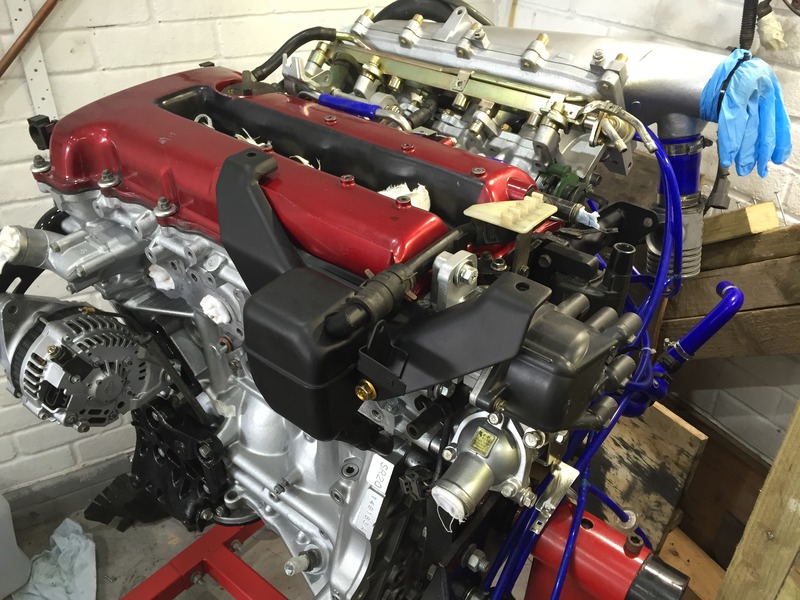
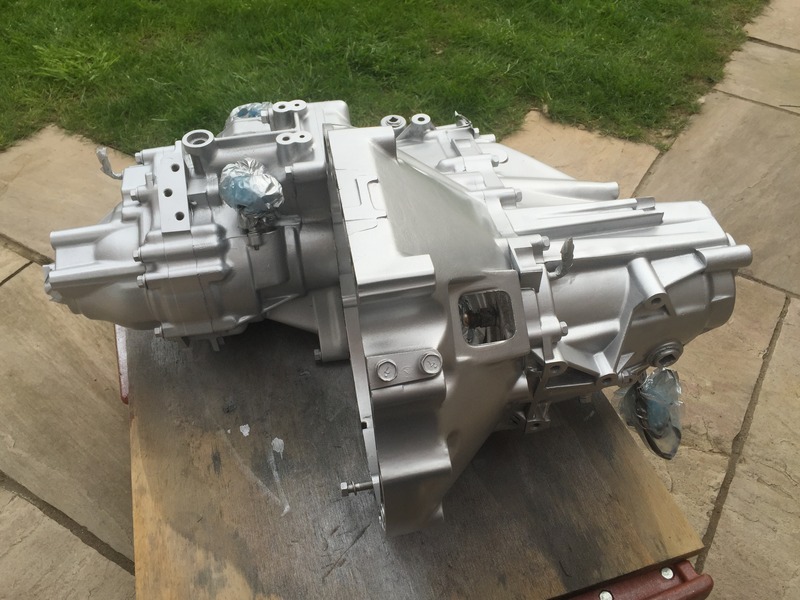
Something I toyed with for a while was whether to paint the engine or not, we all know aluminium gets a white powder over its surface over time as it oxidizes, and looks a bit pants or paint it but paint doesn’t last forever and can mark peel then look even worse..  Clearcoat would be best of both worlds but I went for paint ali colour.  Problem is once I did the block and head I found I couldn’t stop!! Laughing everything started to get stripped and painted including the alternator, I knew things were getting bad when I opened the brand new Nissan water pump and painted that too Laughing all ancillary water pipes, power steering pump, oil cooler, starter motor, dizzy…. You name it, it got a coat of black or ali paint Laughing

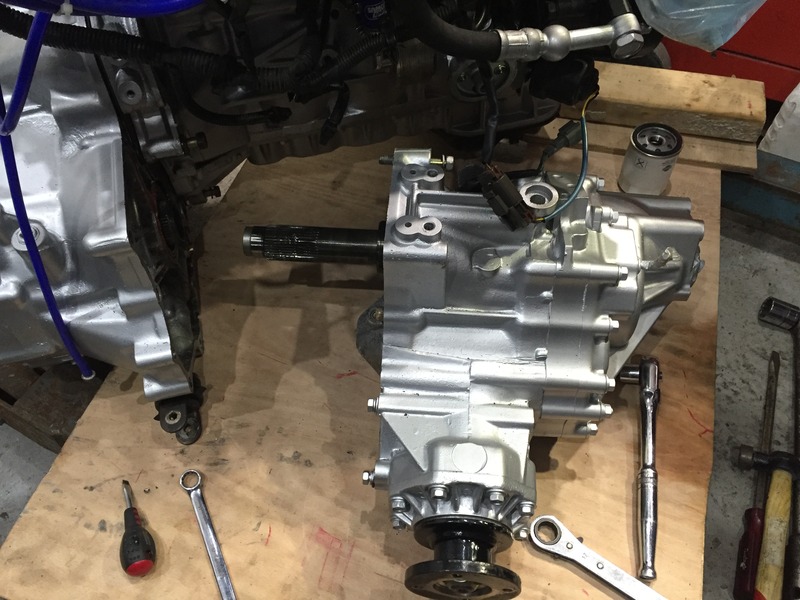
Finally parts turned up from Nissan, I already had a lot of gaskets from previous rebuild kits, but likes of bearings and some O rings I had to order.

Restoration Project - Page 3 C1FBEF46-4AA4-43D4-8B6B-2B57C47E3D92_zps4nztd9ae

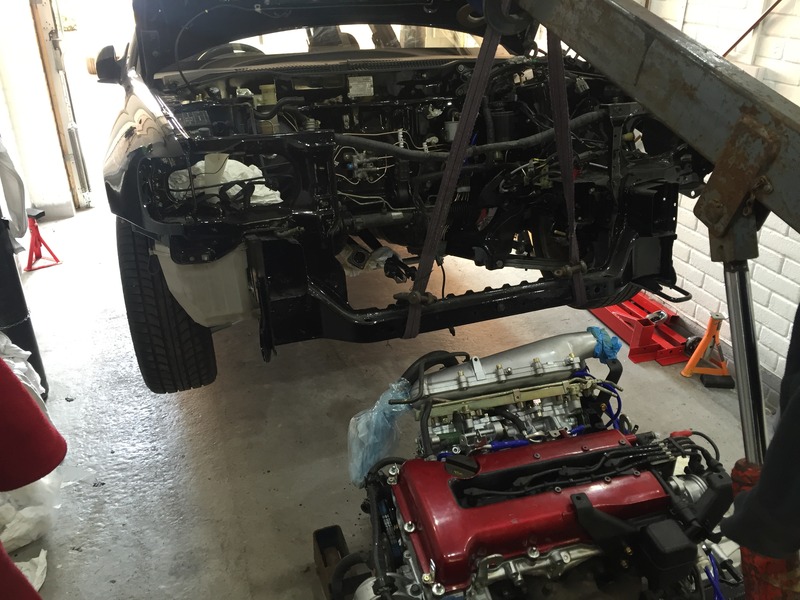
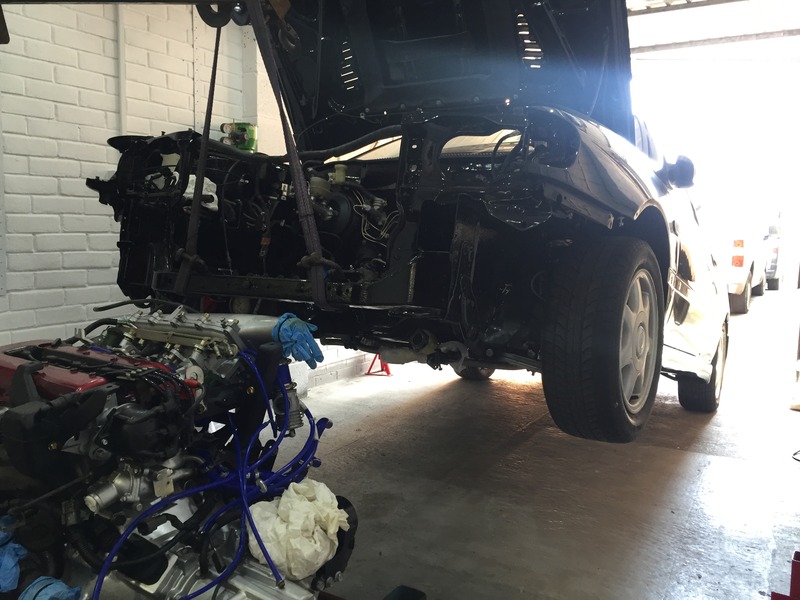
With the baby’s due date only a few weeks off, I booked a few days of work and hammered the rebuild, I wanted to get the engine built back up before I get banned from the garage for a few months.

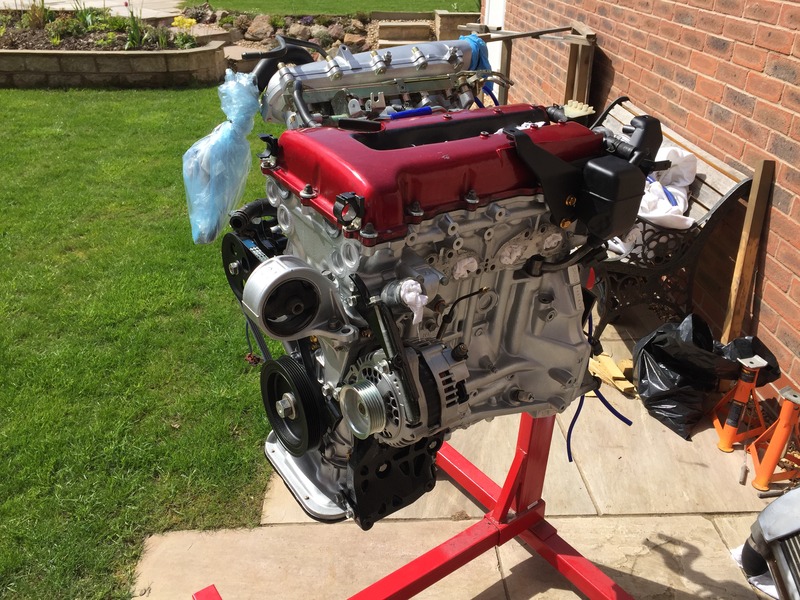
So here’s how far I’ve got with the rebuild:

Restoration Project - Page 3 A4DE0B30-6011-41C1-AD35-31E1A8A21C91_zpstdmhuhok

Restoration Project - Page 3 593A0BD2-B537-4E88-87A3-C5013371704D_zpszrfkeiqr

Restoration Project - Page 3 2716FB7E-3F5D-4551-8C8F-404612BD3C79_zps020qygib

More lube

Restoration Project - Page 3 77B3FF35-2546-4CCB-B950-23934BA4E571_zpstd2jydsn

Restoration Project - Page 3 3D51DA37-05E7-462A-B5FF-AF544358B580_zpslxnxg681

Restoration Project - Page 3 40A8A8DB-6A98-47EA-8F1F-5AB0DFC4D4EB_zpsftcekocr

Restoration Project - Page 3 25D1202E-E126-40AE-8E99-F001300167BD_zpspk1fmkdl

Set all ring gaps up to what the manual showed, time consuming mind (photo doesn't show the correct ring position)..
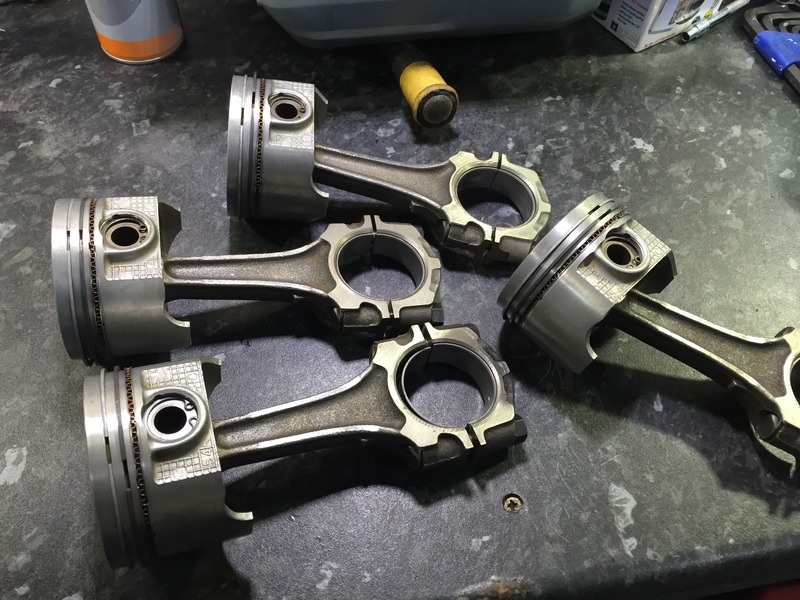
Restoration Project - Page 3 52135288-4DB8-403C-A3BE-444125CC6C75_zpszbm01hkb

Last one to go in

Restoration Project - Page 3 782C6F7D-998C-4D45-B9C3-A48386F056F5_zpsme1na71u

Set to TDC ready for head

Restoration Project - Page 3 7297E584-5125-4BBC-9D97-1E94CE0E2E08_zpsxdjdcuca

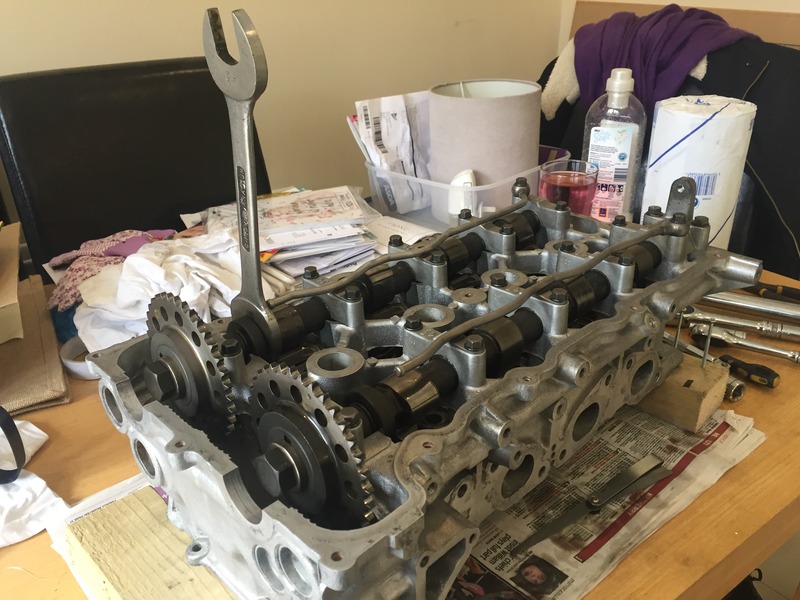
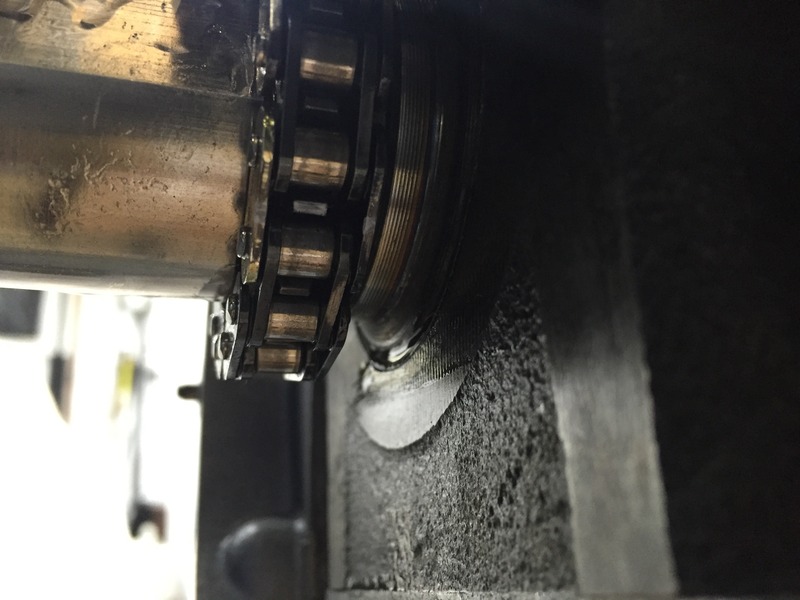
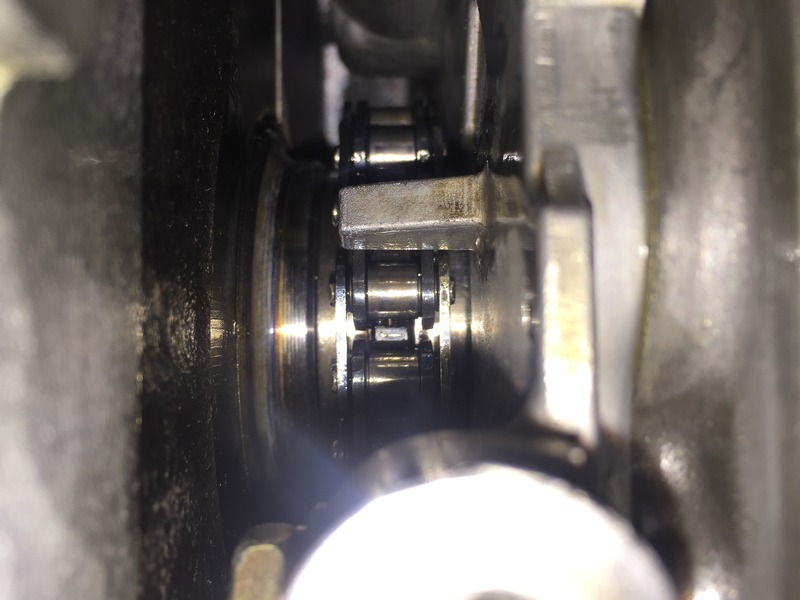
I was in two minds of how to do the chain, do I leave the chain cover off until the heads on to make sure the chain doesn’t slip off the bottom sprocket, but then have a mare trying to get the cover on??  I ended up putting the chain cover on first, but put and mark on the chain and gear tooth, so once heads on I could spin it over and check the paint marks lined up still, I can say this worked a treat!!

Restoration Project - Page 3 C3FC3CC8-3B48-4584-9CBF-4715EF42D47A_zpsxqvhy7f2

Restoration Project - Page 3 6D5E0189-8AE1-447E-B63C-DD7AB28E81CA_zpsodd22fw1

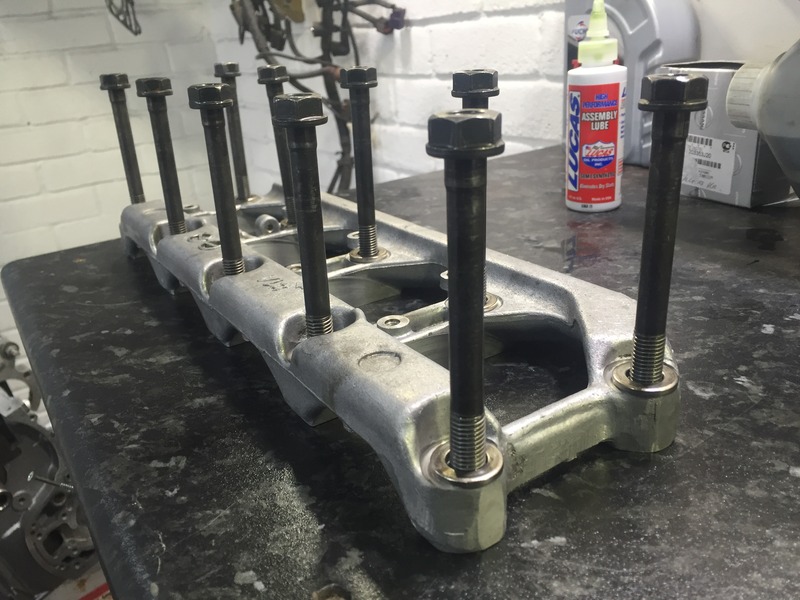
Time for a bit of head….. torqueing down, think I need to go the gym I bit more often , certainly takes it out of ya tightening head bolts!

Restoration Project - Page 3 29EEE727-2258-4C19-BA4E-2F5B55258BDA_zpstp1wdwnw

More lube

Restoration Project - Page 3 04B8D484-A182-4B0D-807A-D7867973C669_zpsq0s8xmus

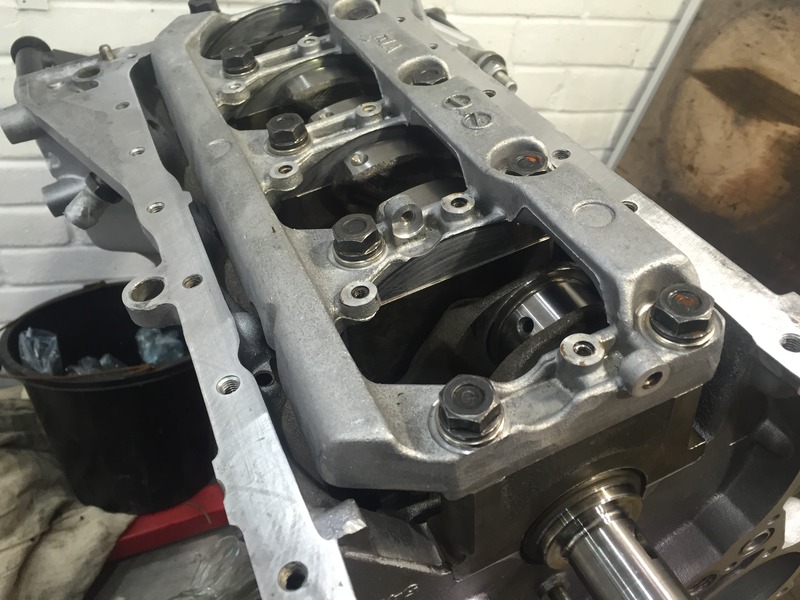
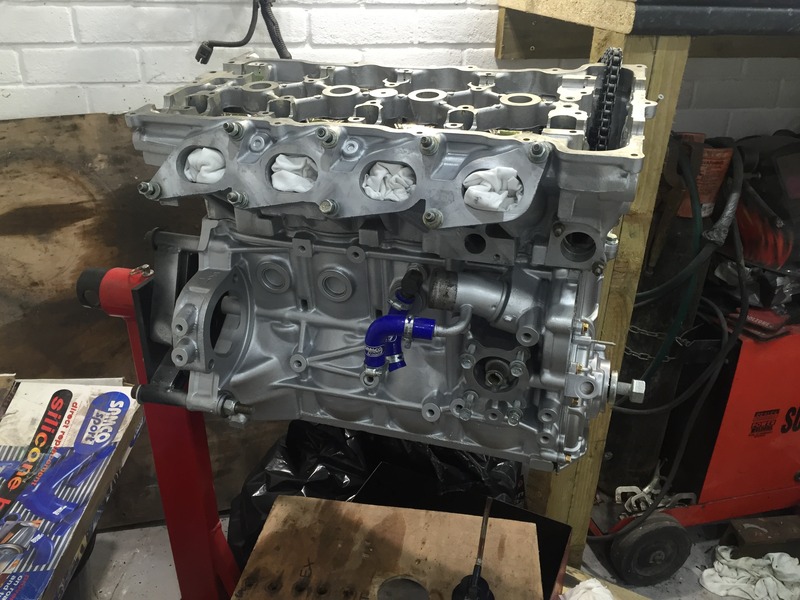
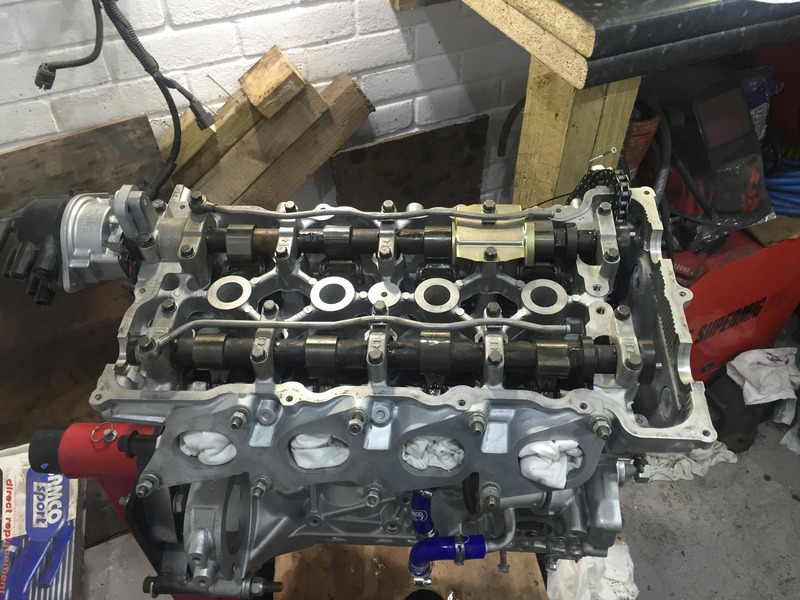
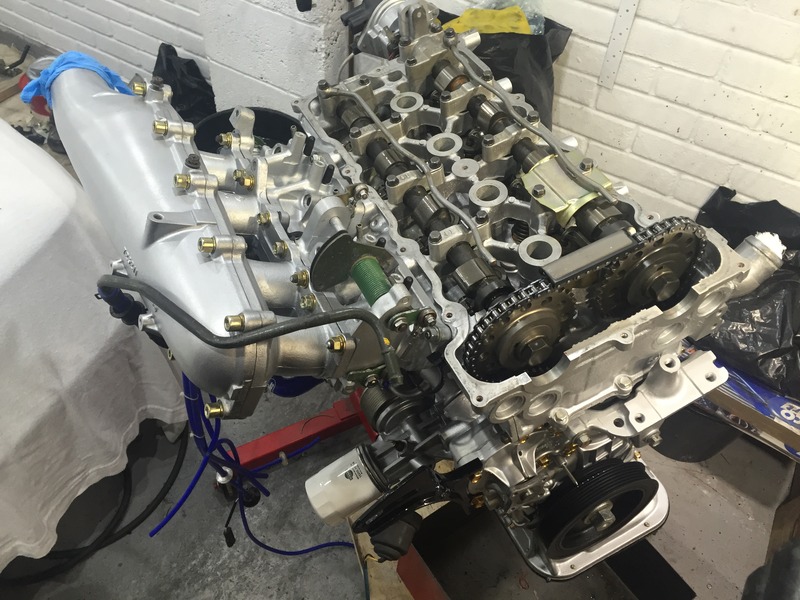
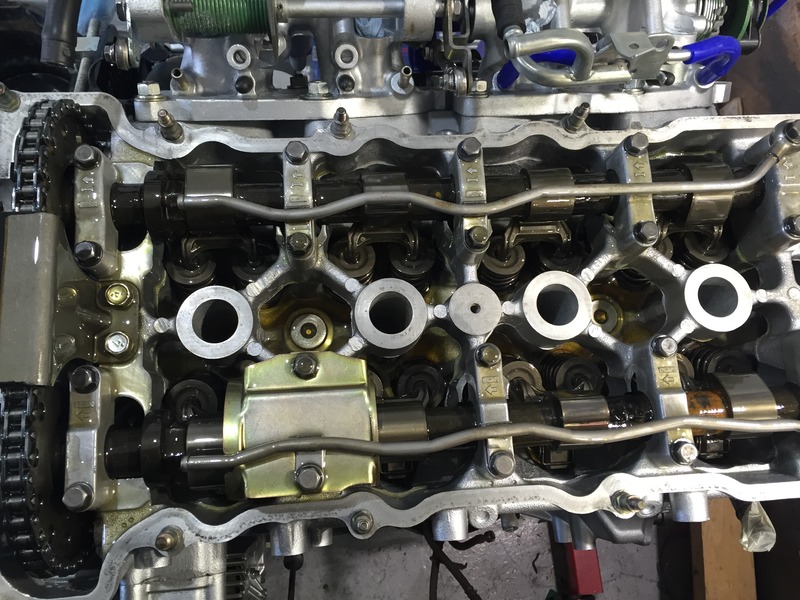
Cams in, just need to check the chain hasn’t skipped a tooth

Restoration Project - Page 3 6F755B41-FF8E-4201-AD38-C6D3760D0899_zpsuebligho

Restoration Project - Page 3 8BD2BB74-46C1-4469-B779-B9D43E200876_zpss1qb7bke


Last edited by burrows1980 on 15th May 2016, 8:16 pm; edited 1 time in total

52Restoration Project - Page 3 Empty Re: Restoration Project 15th May 2016, 7:41 pm

burrows1980

burrows1980

Hard to see the white mark in the photo, but was spot on.

The sump cover, I ended up using POR 15 after soaking it in hydrochloric acid to remove all the rust, can’t fault the stuff on the running gear of the car, so might as well use it on that with the amount of punishment they get

Restoration Project - Page 3 943F40F4-2F8F-435B-BC82-2AB53DBE0F6E_zpswjl1np65

Getting somewhere now

Restoration Project - Page 3 0B18AE5B-D97F-4407-87D2-0117F2E21C88_zpsllqfg9lx

Painted pulleys of course and applied new markings for the timing, and zinc plated the bolt with the kit I got off ebay

Restoration Project - Page 3 878FFDC6-D116-471E-BE50-812E94A6DBCD_zpseyyub864

Water pipes all cleaned and painted ready for fitting

Restoration Project - Page 3 7EC8DA44-2B2E-4342-BE8E-0FC50001D677_zpsbkmw0d1z

Easiest filter change ever Laughing

Restoration Project - Page 3 C4607C0F-187A-43B9-B92C-EA06FF5A789A_zpse2tottnh

Restoration Project - Page 3 B9215571-FF1D-4BE5-AF71-2EDA2B6FBA9F_zpsmhnnfacf

Zinc plated the alt pulley, just so it looks a bit different from the rest

Restoration Project - Page 3 35F16638-1B6E-4809-B46A-F8BA5D9DE662_zpsr2eqpx3w

Restoration Project - Page 3 F3C03CA4-7E2A-41FC-9B44-AD2B6F025E38_zpsa22uvnqg

Before putting the rocker cover on for the last time I poured running in oil over everything, leave it in for 500 miles, drain flush and replace with proper oil

Restoration Project - Page 3 0779A17C-C69E-4C45-B48C-C7CFEAEFD2A1_zpsalhjqj3r

Restoration Project - Page 3 F667AADD-8E6C-4604-B362-AFF0F96DCA42_zpsyavvzpyn

Restoration Project - Page 3 7BBC77B7-C3B9-483C-96A5-42A24C7D62E7_zps1hj4ikbp

Starting to look like a built engine again

Restoration Project - Page 3 A31B24F1-658E-4F88-BEF5-BADA2F32B688_zpsnk1haiu8

Time for a sunny photo shoot Laughing

Restoration Project - Page 3 D71052A7-F066-41FE-BC5A-C6CFBD371C9F_zpsq15ohpmd

Restoration Project - Page 3 011799BE-1486-45CA-86B5-B17FE0792BAF_zps5wnk06s7

Restoration Project - Page 3 0C4A6086-ACB9-4BFA-B4FF-2C6692B7951B_zpsjewzn6qt

Aircon pump back on after paint etc

Restoration Project - Page 3 A4BFCF3F-7897-495A-9160-3F265AEBCA36_zpshsv8dih1

Expecting to get the engine in imminently I wanted to replace a few of the dodgy looking power steering hoses that have bugged me for a while now

Restoration Project - Page 3 2233F865-D0C2-4C5F-9DEB-2825FD9E9BC7_zpsajl6mv0t

While waiting for the turbo to come back I turned my attention to the gear box, full clean and paint later

Before:

Restoration Project - Page 3 624B246E-A38B-450A-9A3C-3E16DBA54249_zpsrhzjlsuj

After a wash with screwfix degreaser and a brass wire wheel

Restoration Project - Page 3 417D15B9-10AD-47FE-8406-CDC8A398C733_zpsj8ltuqtv

Restoration Project - Page 3 5BE0CE04-C070-4B67-A15C-393BD7F98A2E_zpstga2yqua

Restoration Project - Page 3 2D29A23D-B1AE-4BD7-A439-E78EFAEA6572_zpshmvfhwm7

Time for paint

Restoration Project - Page 3 DFE5D87B-240F-44E4-8CBC-A7C15395E5FE_zpst7hcfzbh

Restoration Project - Page 3 96560126-65F5-4A6A-9C69-339D6757BE8C_zps2ubjvqyq

Replaced boot on the striker rod, ball ache to get the yoke off

Restoration Project - Page 3 AA09D532-4EDB-4DA5-816E-26D845AC9910_zpsl3ko0pqa

Got the turbo back and built up just in time for fitting with Bogdans elbow, that’s when it went slightly wrong

Restoration Project - Page 3 57D1648A-CBD8-4941-92FA-1C2008FF1B69_zpsj40umyrf

Elbows designed not to have aircon Laughing doh, as I like aircon it’s not an option to remove for me, so back to the standard elbow while I modify the Bogdan one!

Restoration Project - Page 3 25D459D5-72B7-4F49-B84E-ECF19FA56521_zpsiyioxfxz

So nearly done, thankfully I’ve taken 1000’s of photos of the whole build, some to look back on if I’ve done something correct and to remind me of something I need to change, thankfully this paid off the other day!!  I fitted the turbo and forgot to take the masking tape off the oil return on the block! Yep I pushed the rubber pipe on from turbo and noticed a photo later and thought shit there’s masking tape on that still Laughing  

So from today it now sits like this

Restoration Project - Page 3 20D760E4-C15D-4DF5-B4BB-DB8320981AA4_zpsdpbazjhk7

Baby due date is today and the oil gallery bungs that I need before fitting the cheapest clutch kit aren’t due into Nissan until this Thursday, so I’ve admitted defeat that I wont get the engine in and fired up until later in the year, boooo!! Laughing

I’ll leave this update here for now, hopefully next update will have a video of and engine explosion or something along them lines Laughing

Gaz

53Restoration Project - Page 3 Empty Re: Restoration Project 15th May 2016, 8:03 pm

burrows1980

burrows1980

Fitted the standard wheels today as well

Restoration Project - Page 3 9D56AB27-90C1-4199-8EA0-AF155B360780_zpswgre8sfr

Restoration Project - Page 3 E0EA7428-331C-450D-92A7-43F7BF834172_zpsro81ctai

I like em Laughing

I also refurbed the brakes last week too, one siezed rear caliper

Restoration Project - Page 3 1F830B71-EA91-48C8-B5B3-B6EC74A21EB9_zpsucj36tq1

Bit of screwfix degreaser and brass wire wheel again Laughing

Restoration Project - Page 3 D4372608-F002-419F-88AA-D9374444F392_zpsxws13kib

Restoration Project - Page 3 3B2920A0-7C96-4204-AD80-79F186EF24D9_zpsytwqijmb

Restoration Project - Page 3 CC840D08-6D13-44E8-B0EC-DA9962D103C5_zpsjplvrtpb

Cleaned the discs up just for bleeding purposes, oh and painted them with high temp paint, new pads all round Laughing

Restoration Project - Page 3 54FB2177-DCE8-4F49-BBA8-70F79B3E9CDB_zpsph7l0dd3

Home made rewind tool

Restoration Project - Page 3 82296BC6-E5BB-4B7B-9F66-B89C958D7D41_zpsgite2ngx

Restoration Project - Page 3 586B519D-72C5-43E2-8DCF-6155B7729349_zpsh8mridko

Could of done with another coat of paint, but they'll do for now

Restoration Project - Page 3 374CB475-816E-49F4-86BE-C6E826C8E2AA_zpsnxddt2kl

Braided hoses all round

Restoration Project - Page 3 26D2D7B6-73AE-4420-9E7E-312CAD464BE0_zpsvyh0qkdx

Bought this as well last week for a local cheap motor bits n bobs shop

Restoration Project - Page 3 C6112FF0-1F48-43C6-9482-EE5589A4044D_zpstpzg0yxm

Easiest thing ever for bleeding brakes, connect to airline, place clear hose onto nipple on caliper, fill master cylinder to max then place other contain in reservoir with brake fluid in open tap, go back to caliper press trigger and it pulls the fluid through!  the container in the reservoir fills the master cylinder back up!! bearing in mind my system was completely dry, with all new copper lines from master cylinder to caliper. Got in car after doing all calipers, 3 pumps on pedal and rock solid thumbsup

Gaz

54Restoration Project - Page 3 Empty Re: Restoration Project 15th May 2016, 10:17 pm

nomad

nomad
Admin
Admin

Great update gaz .... shes looking super clean better than factory you the man


_________________
"Official post whore" and all round superhero....

55Restoration Project - Page 3 Empty Re: Restoration Project 15th May 2016, 10:21 pm

Andy Sunny Gti

Andy Sunny Gti

Well done that's amazing work. Credit to you. Good luck with the birth.

56Restoration Project - Page 3 Empty Re: Restoration Project 15th May 2016, 10:37 pm

Stu

Stu
Admin
Admin

Cracking job mate Smile


_________________
Back againTwisted Evil
http://www.j10-meets.co.uk

57Restoration Project - Page 3 Empty Re: Restoration Project 16th May 2016, 12:23 am

gtir_woody

gtir_woody
moderator
moderator

Great work mate thumbsup

58Restoration Project - Page 3 Empty Re: Restoration Project 16th May 2016, 7:04 am

burrows1980

burrows1980

Cheers chaps, good to see it nearly in one piece again. Shell needs a full buffing, managed to get a few tiny marks on the paint.

Actually dreading getting her dirty now Laughing it's there to be used, so think I need to grow a pair Laughing

59Restoration Project - Page 3 Empty Re: Restoration Project 16th May 2016, 7:37 am

gtir_woody

gtir_woody
moderator
moderator

Really impressed with how clean and fresh everything looks, it takes alot of time. I really like the standard wheels, dont see as many with them these days.

60Restoration Project - Page 3 Empty Re: Restoration Project 16th May 2016, 8:06 am

burrows1980

burrows1980

Got a slight bit of curbing on them, quick sand and paint they'll look really fresh. Am thinking of spraying them a darker shade of grey to see how they'll look?

There's a company somewhere making 17" or 18" replicas of Escort cosworth wheels wonder if our wheels could be done?

61Restoration Project - Page 3 Empty Re: Restoration Project 16th May 2016, 9:22 am

gtir_woody

gtir_woody
moderator
moderator

Ive always preferred darker colour wheels on a black car. However being original wheels maybe the best suited colour is original scratch

62Restoration Project - Page 3 Empty Re: Restoration Project 20th May 2016, 7:46 pm

burrows1980

burrows1980

So I took a gamble today!!  Nissan emailed on Wednesday to say the bungs I’ve been waiting for were in, the wife popped down yesterday to pick them up.  She wasn’t showing any signs of labour so thought here goes let’s get the engine in Laughing

Got home from work yesterday, straight into the garage, she even brought my dinner out to the garage Laughing  Got the best hoist ever made assembled, engine off stand and started to get the fly wheel & the £26 clutch on Laughing

So first job was to replace the spigot bearing in crank, popped old one out and carefully tapped new one in
Restoration Project - Page 3 5D3073D4-875F-4AB5-BA2E-4E6069FDD0B8_zps6gzps3ol

Cleaned fly wheel up, I think it should have been skimmed, a few gouge marks.  I know it may seem weird but I plan on removing the engine in a few years again once finances get better to forge it, so things like the flywheel can be addressed then.  Never planned on stripping the engine fully this time!

Restoration Project - Page 3 B45860CC-892F-41C9-9FB8-094AEC92F906_zpsdw4s8x9g

Restoration Project - Page 3 016CF4BF-D9C0-4A40-A0B0-235D0E4CCA29_zps5qto4gco

Bolted that up, then it was time to see if my bargain clutch was right!

Restoration Project - Page 3 7FBA6E29-CB40-4B44-875D-EDE12EDE2E07_zpsoro04bfr

Thankfully its right, woohoo!!

Restoration Project - Page 3 C61AE5A0-B09E-469D-913F-05A8EEA4386B_zpsucfr2nt2

Restoration Project - Page 3 99738BA0-56F3-4965-A8E2-0EF28097390F_zpsx2ryl2pg

Restoration Project - Page 3 05F55994-8EC3-465F-9184-91324B3AEA0A_zps8vg3hirp

^don’t ask I like taking photo’s!! Laughing

So at this point the observant amongst you will be thinking, why the hell has he gone to the trouble of fitting the fly wheel, clutch plate and cover but not put the engine to gearbox spacer plate on??  Well fellow forum friends I err… forgot Laughing  A lot of shouting and swearing later I decided to fit it in an unorthodox way, yes shall we say the fly wheel remained on!

Clutch fork fitted, and when Nomad pointed out last night why I hadn’t welded it, well I forgot and by that point was already fitted Laughing

Restoration Project - Page 3 8B1885DB-98C4-4C4A-A3A4-C010F77D124C_zpshn2ebdig
Restoration Project - Page 3 A17F1D9F-DF66-4269-B51E-BBA9F6A35CBC_zpsr56xhuoy

Time to get the box bolted up.  For some reason unknown to me I decided to fit it with the transfer box on, after much swearing trying to line it up I was about to throw in the towel at 8pm, but all of a sudden it just slipped on, great I thought, started getting the bolts things going well until I got to the bolt by the speed sensor, Could I hell of like get that in and when I finally did the speed sensor just pissed me off.  Gave up at 9:30pm, leave it until tomorrow I thought.

Got back in the garage at 07:17 this morning and thought rights lets ave it!  Still couldn’t get the bolt in so ended up pulling the transfer box off, easy now Laughing

Restoration Project - Page 3 E818A6E5-113F-41AC-810A-12AB688FD2EB_zps7ubyledf

Bolt in question

Restoration Project - Page 3 6528949C-CBB4-4C8A-9B83-D4EA1CA63548_zpsi9ixg1ne

Scraped old sealant off and stuck some new on, bolted transfer back on and all good

 photo EA966529-D72B-48AB-B420-F4E818C95110_zpsism0vw8q.jpg

Restoration Project - Page 3 A75FCD2E-0A44-4766-8C1C-76E3BBF6929D_zpsjjkvn23l

Slacked fill points off as well, unscrewed very easy...

63Restoration Project - Page 3 Empty Re: Restoration Project 20th May 2016, 7:48 pm

burrows1980

burrows1980

Time to get one last sunny photo shoot before installing it:

Restoration Project - Page 3 0548EF58-05E2-4BF0-BCE0-21270D4FD6EC_zpsudcgx83z

I’m going to regret showing the next photo, ready for the onslaught of wtf you put that on for Laughing

Restoration Project - Page 3 0038E161-6EA4-440F-8BF7-5542F37779F3_zpspvc3mpq6

Yep I dug it out of the loft painted it up and slapped it on Laughing don’t know why myself really not had it on for years, decided I needed the space in the loft Laughing

Restoration Project - Page 3 74825D77-6A32-4183-BE77-CB14A4CECEC0_zpsszrqqjat

Already to go now:

Restoration Project - Page 3 6EDE6B84-24C3-4B2D-ABA1-B9232BE56C8D_zpsxnt75vjg

But had a little problem just before this photo!  On my list of things to do before putting engine in was check chain tensioner.  When I built the engine back up, I had a metal gasket for the tensioner but not an O ring, scoured FAST and no part number, didn’t think much of it, but I found a huge tub of assorted O rings in the loft.  So I got another gasket from Nissan and thought before I put the engine in I’ll replace that O ring.  Turns out I haven’t got an O ring as thin to what’s on that! Oh well put tensioner back in and mover crank back a bit to spring tensioner out but the crank locked after about a inch of moving! Err wtf I thought went the other way  and same thing.

Straight away I thought somethings wrong with the clutch its jamming etc somehow.  Pissed off at the thought of removing the box and the Y bracket Laughing I took a breath and a few minutes out to think what could be happening.  Removed rocker cover and noticed the chain wasn’t taught! Rotated engine slowly and could see the tensioner moving in and out, ratchet not locking properly, grrrr, but relief that I don’t need to remove the box!!  Bit of a fiddle and go it locked and engine rotates fully again, so yeah a new tensioner on order!  Yes I know I should have put a new one in, but we all make stupid calls at the time!

Checked on the wife again, no sign love? Nope all normal, cool let’s do it! <--- put the engine in I mean! Laughing

Restoration Project - Page 3 2865DE30-5E86-44E2-B38B-4BC6B9F09660_zpss8fqgata

Hoisted car up, engine already level on the dolly, once high enough push it in.

Restoration Project - Page 3 79E2403E-8933-4C8B-B7DA-5E99FBAD6B97_zpshevz4ocz

Slammed look Laughing

Restoration Project - Page 3 E4EC77FC-0C41-4744-9912-E6F4F67C594D_zpsb2tgj25l

Restoration Project - Page 3 81D4AA96-3834-4FA6-81A3-355AF96F5644_zpsr9bbk8ea

Restoration Project - Page 3 9ADDB0F5-D354-4624-AFC1-37FE0CC98350_zps4x5vadzz

Restoration Project - Page 3 49648A4B-9239-4200-AB22-7BBFBC604035_zpswgrbbv6l

Luckily the car was high enough to roll the engine in, carefully calculated as I like to say!

Restoration Project - Page 3 226FEA15-9F51-4512-9508-B0FE1C9FF45A_zpscynxla5t
Yep wouldn’t get much higher Laughing

Once in, just a case of putting the hoist on a slow lowering thingy and watch it all line up as it came down, oh and take the left engine mount off first!! Took the front wheels off and it lowered down a treat, no pissing about with trolley jacks lifting one side up to get it to line up etc

Restoration Project - Page 3 3968A70A-B3E8-44A3-AC7E-0C28E86E3094_zpshfbcduwv

Restoration Project - Page 3 1F2620A3-8BD2-48F2-BB3E-7E47A61E1D00_zpsu4ndf6ps

Mounts on, time to connect gear linkage and prop, couldn’t resist taking a few photos underneath, don’t think I’ll ever take this out in the wet again Laughing

Restoration Project - Page 3 144DA413-3BA8-4A74-8BE1-E0EABDC6135D_zpsiguqjqr7

Restoration Project - Page 3 9D0E2470-2459-47CC-B1E5-73AFB4447587_zpsebgoouru

Moved onto bleeding the clutch and make sure it works right, I didn’t show this in my last update, but the bleed kit I got is ace, only cost me £18

Restoration Project - Page 3 A385B221-B765-4DD7-A139-E43A1FED3120_zpsl5grrefz

Restoration Project - Page 3 FEC26640-FDB1-41B5-B969-1DC55775A07E_zpsjenh2wds

Connect it to the air supply and off you go!  Pedal feels really light and smooth, think having braided lines help over the 25 year old rubber shite that was on it.

Took her out for lunch to keep her happy and moving, came back and started routing cables and connecting crap

Restoration Project - Page 3 B00EA8A6-FAF1-4108-A4C1-4A14DD5EEBC1_zpsqrsfhcdl

Restoration Project - Page 3 096B0F90-85CD-46AE-9C47-C543B1FF54ED_zpsffji9itp

Restoration Project - Page 3 9E6C8DBF-657F-4AC9-88D7-BA92CDD14AAF_zpsqd1yg5ep

Restoration Project - Page 3 2AEAF45D-37CE-4FFF-90FD-BD6F507F8626_zpsgnvttzwl

Restoration Project - Page 3 2660A100-25DC-4161-BD14-3F69B4C7A454_zps4ca9t4xa

Restoration Project - Page 3 B27F5A0C-7B07-4D38-AE4C-9F9165AD292E_zpsn6kddk9e

So thanks to the wife for going a week over due, ive managed to get the lump back in, hopefully will get some time to tie up the loose bits n bobs, maybe get chance to fire her up late summer all going well!

So this really is the last update for a while now, doubt she’ll be so understanding the more over she goes Laughing

Gaz

64Restoration Project - Page 3 Empty Re: Restoration Project 20th May 2016, 8:18 pm

johnny gtir

johnny gtir
moderator
moderator

Well done mate and just offer to do night feeds n nip in the garage take the baby monitor with u and crack on lol. Tell the truth tho it's so clean you don't want to use it. Cars looking great well done and good luck with little one

65Restoration Project - Page 3 Empty Re: Restoration Project 20th May 2016, 9:43 pm

gtir_woody

gtir_woody
moderator
moderator

Great to see the engine back in now, good work mate thumbsup

66Restoration Project - Page 3 Empty Re: Restoration Project 20th May 2016, 10:12 pm

burrows1980

burrows1980

johnny gtir wrote:Well done mate and just offer to do night feeds n nip in the garage take the baby monitor with u and crack on lol. Tell the truth tho it's so clean you don't want to use it. Cars looking great well done and good luck with little one

Sounds like a plan mate, think she'll be wise to that though Laughing

gtir_woody wrote:Great to see the engine back in now, good work mate thumbsup

Always good to get the engine back in, end is in sight now finally!

67Restoration Project - Page 3 Empty Re: Restoration Project 21st May 2016, 6:08 am

gtir_woody

gtir_woody
moderator
moderator

Did you decide on a colour for the wheels?

68Restoration Project - Page 3 Empty Re: Restoration Project 21st May 2016, 6:43 am

burrows1980

burrows1980

Not yet but probably keep them orginal factory colour or as near too!

I could always spray one darker and see how it looks, and do the rest.

69Restoration Project - Page 3 Empty Re: Restoration Project 21st May 2016, 8:20 am

Mr B

Mr B
gtir technician
gtir technician

looks impeccable .
You going need build a new fancy rotisserie so can wash & detail the underside .
Think you also need carpet your garage & add dust filters :-)
Your first upgrade will be a baby seat lol . have wrenching fun while you can bud :-) good luck ...

70Restoration Project - Page 3 Empty Re: Restoration Project 21st May 2016, 1:17 pm

Cosmic73

Cosmic73

So first job was to replace the spigot bearing in crank, popped old one out and carefully tapped new one in
Restoration Project - Page 3 5D3073D4-875F-4AB5-BA2E-4E6069FDD0B8_zps6gzps3ol

I thought spigot bearing wasn't needed? I didnt fit this in mine, should i be worried?
pale

71Restoration Project - Page 3 Empty Re: Restoration Project 21st May 2016, 2:58 pm

burrows1980

burrows1980

Yeah mate, your input shaft goes into this, acts as support for the shaft under load..

Correct me if I'm wrong someone. That's what I read somewhere.

72Restoration Project - Page 3 Empty Re: Restoration Project 21st May 2016, 3:28 pm

burrows1980

burrows1980

Think your right Cosmic, our input shaft doesn't fit in it, well that was a wasted 3 minutes of fitting Laughing

73Restoration Project - Page 3 Empty Re: Restoration Project 22nd May 2016, 9:25 pm

burrows1980

burrows1980

Sneeked into the garage for a few hours today cheers

Modified Bogdans 3" elbow with a BFH!

Restoration Project - Page 3 EFBA8D5E-CD39-4432-A168-502F9DFAB162_zpsgqanm7kq

Restoration Project - Page 3 31908011-6E5E-4AC2-A3F0-BD3AA2784E3A_zpscugvuvah

It now fits around the aircon pump, and should still flow a lot better than the standard one.  In all fairness it hasnt made a massive difference when looking inside.

Restoration Project - Page 3 C25BCA40-3056-4871-85EB-528BA28232CE_zpsuweaq1gf

Another thing ticked off the list, painted the heat shields, although I need to mount the elbow one.

Restoration Project - Page 3 E4335876-043E-4EA8-81DB-CD610CA1F0DE_zpspy5jzopt

Also got the front drive shafts installed and the gearbox and transfer box filled with oil.  I rigged up a funnel and pipe and just poured it in, couldnt be arsed with them small tubes that come with the 1 litre bottles for filling the gear box.

Restoration Project - Page 3 4961E973-0458-4CC4-84A6-1E08FF90C8B9_zpsjm7qq2fs

Restoration Project - Page 3 68521379-51BE-41F6-805E-6DD0AE314F45_zpsvt166pok

For the transfer box I did use the crappy tube on the bottle, the pipe I attached onto the funnel wasnt long enough  Evil or Very Mad

Restoration Project - Page 3 A0A6A26E-52A9-4064-A364-C5BF40CA60E2_zpsbihltpgz

Also got the garage all tidy as well, very roomy again!! At this rate I might get it started soon Laughing

Gaz

74Restoration Project - Page 3 Empty Re: Restoration Project 22nd May 2016, 9:51 pm

Stu

Stu
Admin
Admin

Great progress Gaz.
lOving this project thread Smile


_________________
Back againTwisted Evil
http://www.j10-meets.co.uk

75Restoration Project - Page 3 Empty Re: Restoration Project 22nd May 2016, 10:01 pm

gtir_woody

gtir_woody
moderator
moderator

Nice progress mate, dump fits nicely now

Sponsored content


Back to top  Message [Page 3 of 6]

Go to page : Previous  1, 2, 3, 4, 5, 6  Next

Permissions in this forum:
You cannot reply to topics in this forum